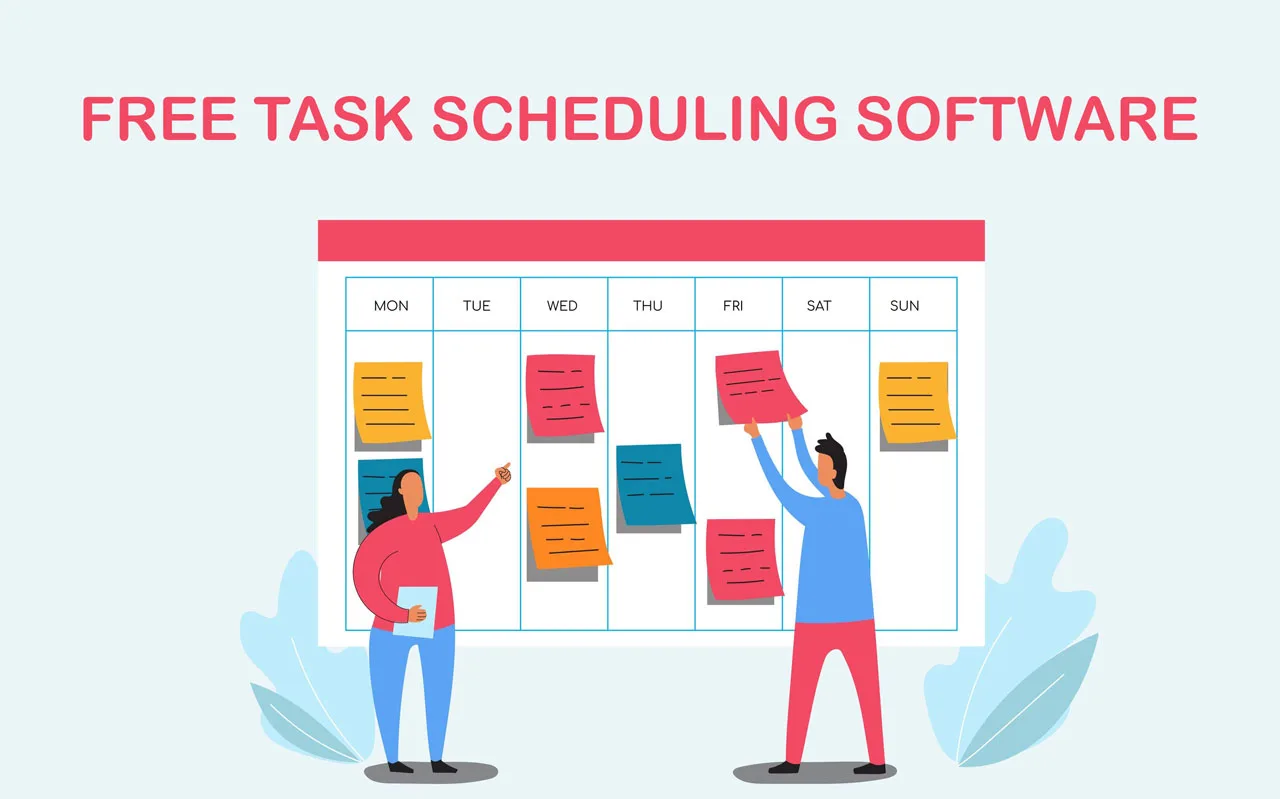
In our daily computer usage, we often find ourselves repeating certain tasks. It might be opening specific apps like your favorite web browser upon startup, or even launching a suite of programs together, such as Slack, Teams, and Microsoft Office. These repetitive actions, while seemingly small, can consume valuable time, and interrupt your workflow. Therefore, you need a software to Automate Task Computer for you.

Wouldn’t it be great if these tasks could happen automatically, without a single mouse click or keystroke, as soon as your PC boots up? Automating these actions not only boosts productivity but also streamlines your computer experience, allowing you to focus on more important things.
Thankfully, Windows offers powerful computer task automation tools to automate various tasks, both productivity-related and system-level. Whether it’s launching apps or scheduling automatic shutdowns, the Task Scheduler and Power Automate apps can help you achieve a more efficient and personalized computing experience. We’ll delve into both of these tools to explore how it can simplify your daily interactions with computers.
Automate Task Computer: Open Apps in Windows with Task Scheduler
Quick Overview
- Estimated time: 5 minutes
- What you’ll need: A Windows device and the app you want to automate task computer.
Open the Task Scheduler App
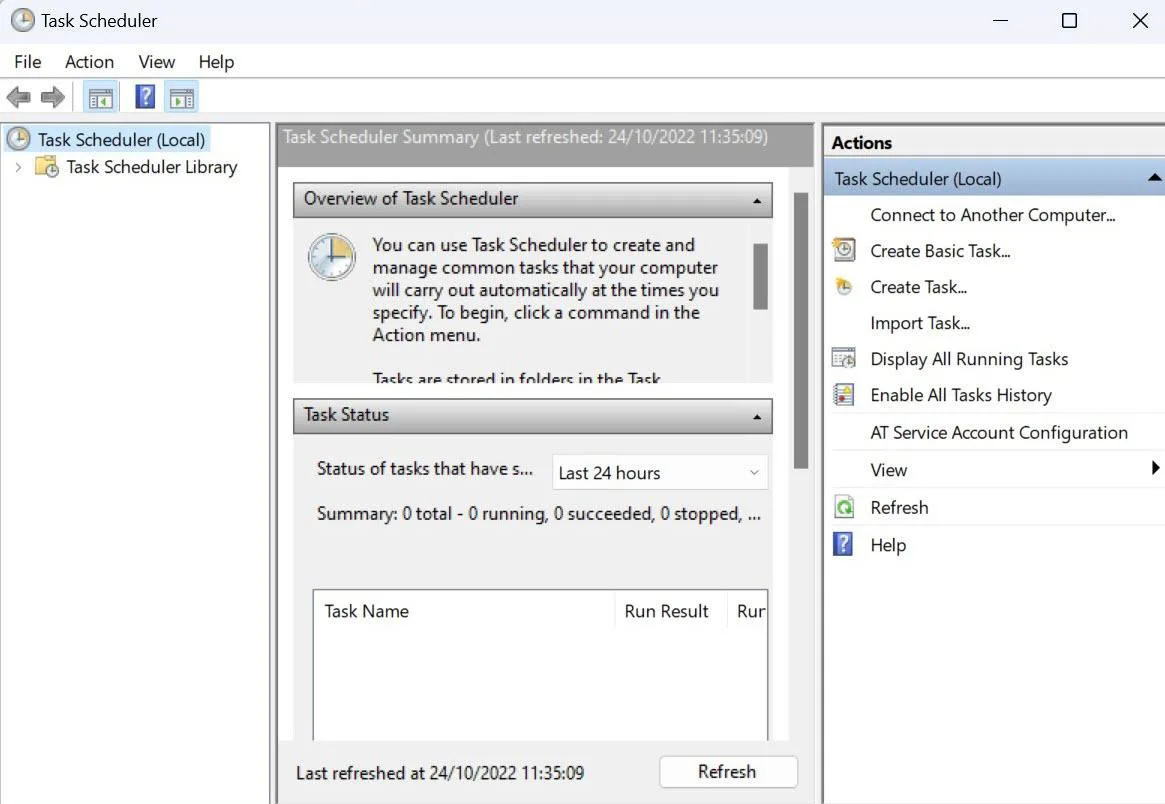
The quickest way to find the app is by searching for it in the search bar beside the Start menu. However, it should also appear in any list of your installed applications. Once opened, it will resemble the screenshot provided
Create a New Folder
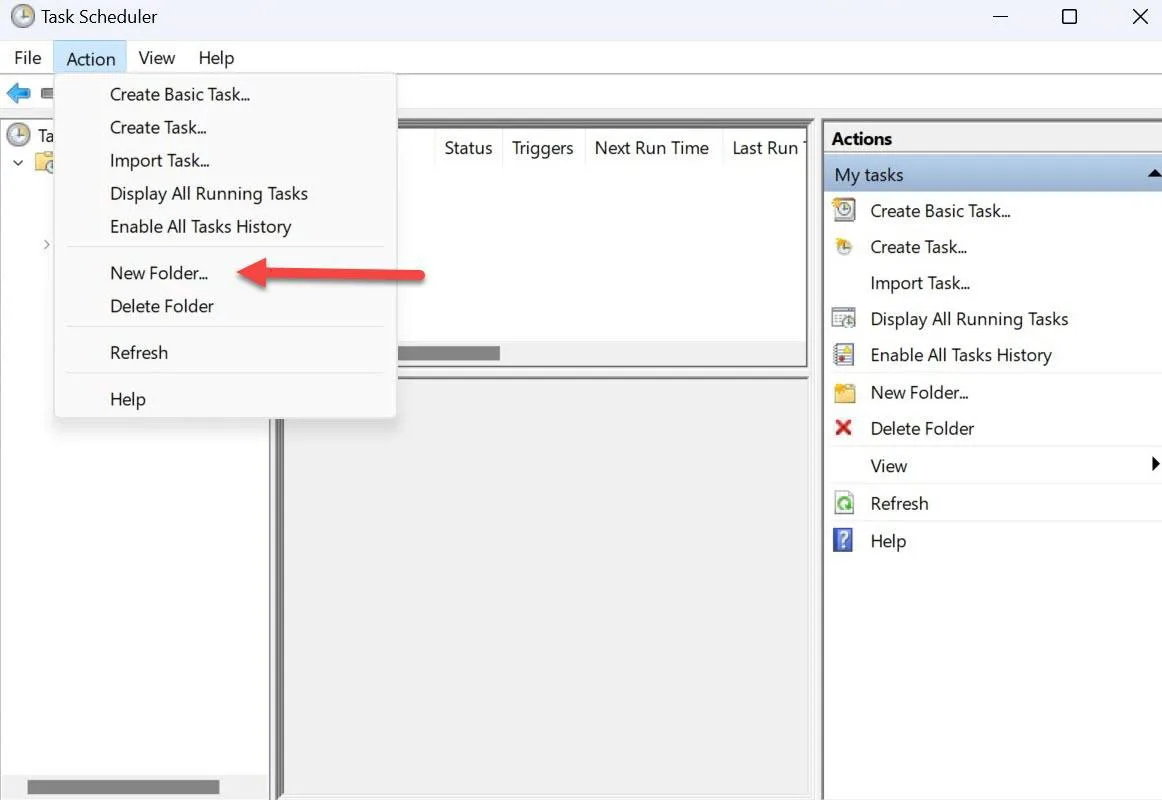
In the Task Scheduler window’s left pane, right-click on “Task Scheduler Library” and select “New Folder…”. Choose a descriptive name for your folder and press Enter to create it.
Create New ‘Basic Task’
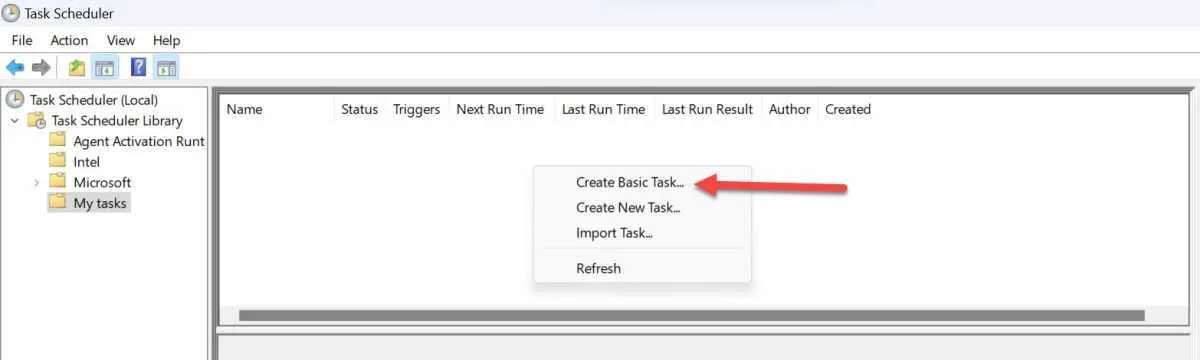
Expand the “Task Scheduler Library” folder by double-clicking it, then double-click your newly created folder to open it. In the blank table within the folder, right-click, and select “Create Basic Task…” to begin setting up your automated task.
Give the Task a Name
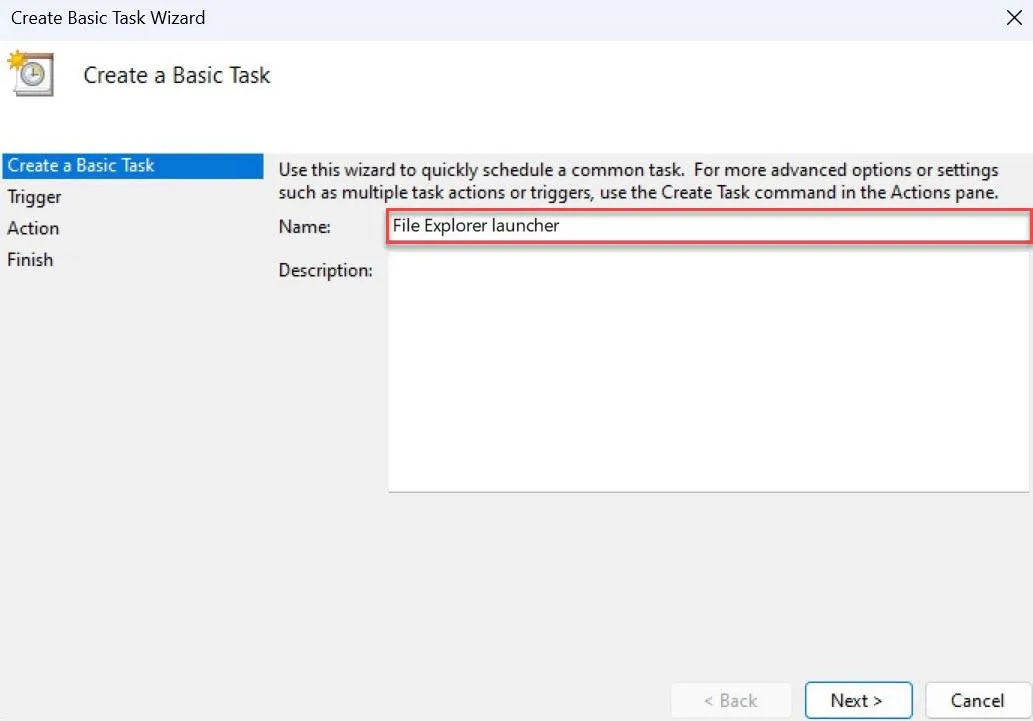
In the “Name” field, enter a descriptive title for your task, such as “File Explorer launcher” in this case. Once you’ve named your task, click “Next” to proceed to the next step in the task creation process.
Choose Task Frequency
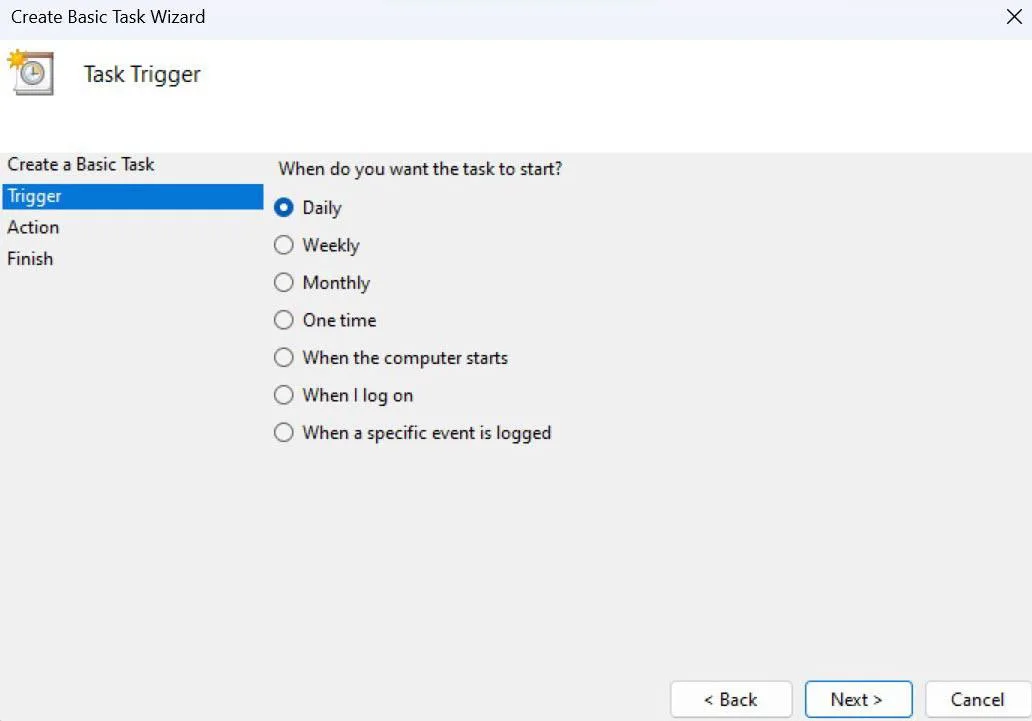
On the following screen, you’ll be prompted to choose how often you want your task to run. There are seven options available, ranging from daily to monthly schedules, although the “when a specific event is logged” option requires more technical expertise. After making your selection, click “Next” to proceed to the next step of configuration.
Choose a Start Time
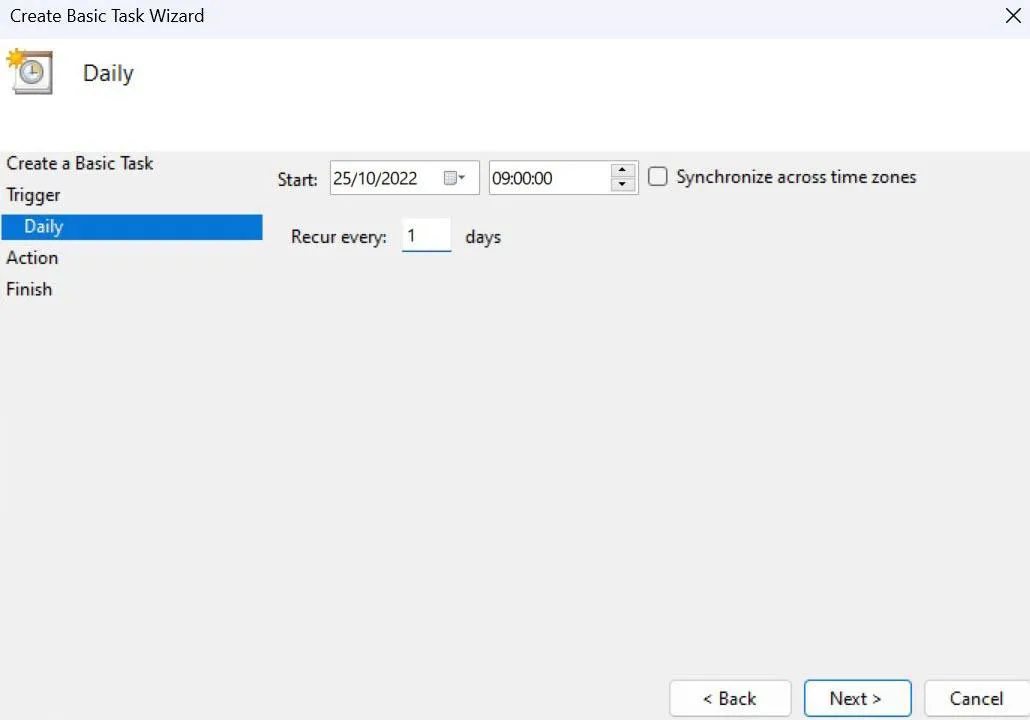
Using the calendar provided, choose the precise time and date you want the task to begin. Next, specify how often you’d like it to repeat. For instance, to run the task every day, enter “1” in the frequency field. Once you’ve configured the schedule, click “Next” to continue.
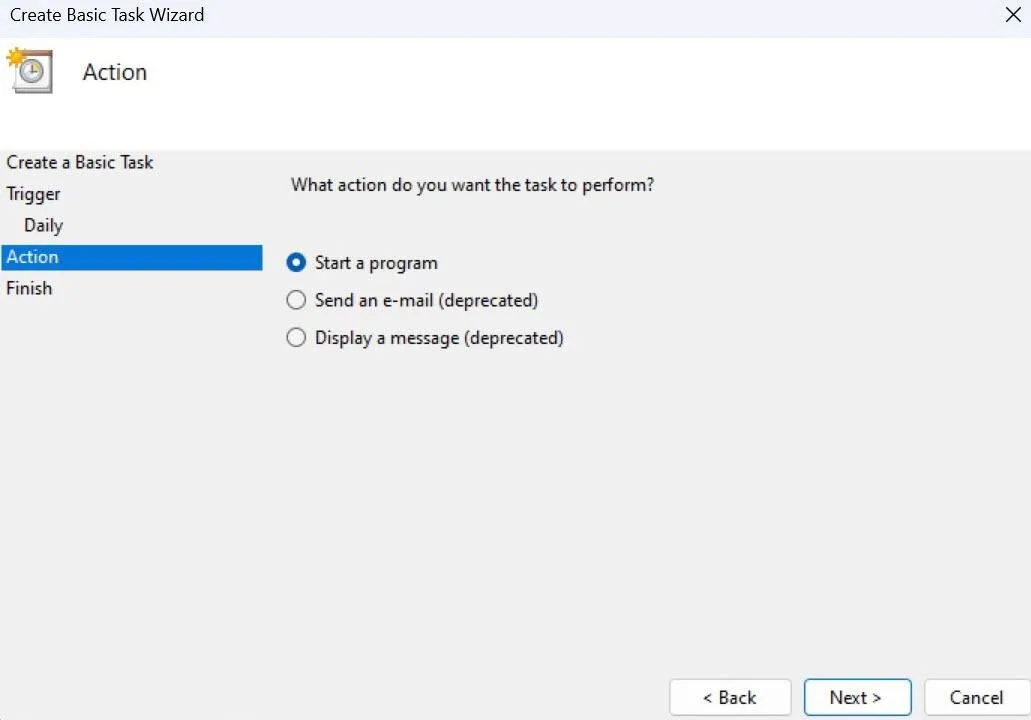
Make Sure ‘Start a program’ is Chosen
While Task Scheduler offers three action options, sending emails, and displaying messages are no longer officially supported by Microsoft and may not function reliably. Therefore, the simplest and most dependable choice is to select “Start a program,” ensuring your automated task successfully launches the desired application.
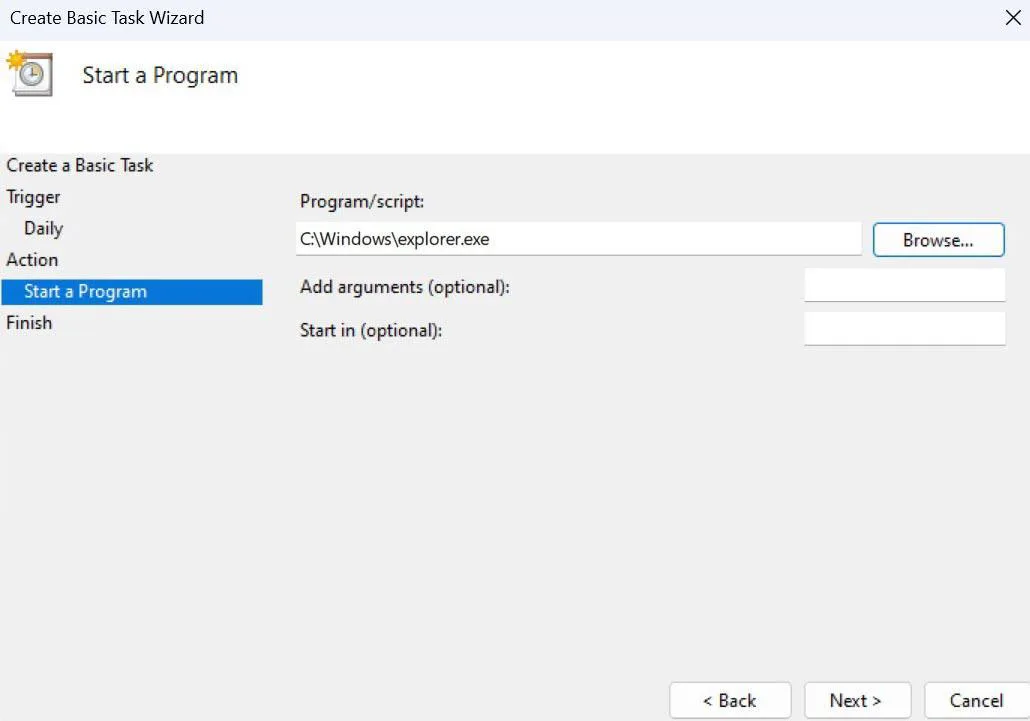
Select the App You Want to Open
Click the “Browse…” button next to the “Program/script” box to find the .exe file for the app you want to automate. While the default location might be the “System32” folder, the specific file you need could be in the “Windows” folder instead. You can skip filling in any optional fields and proceed by clicking “Next.”
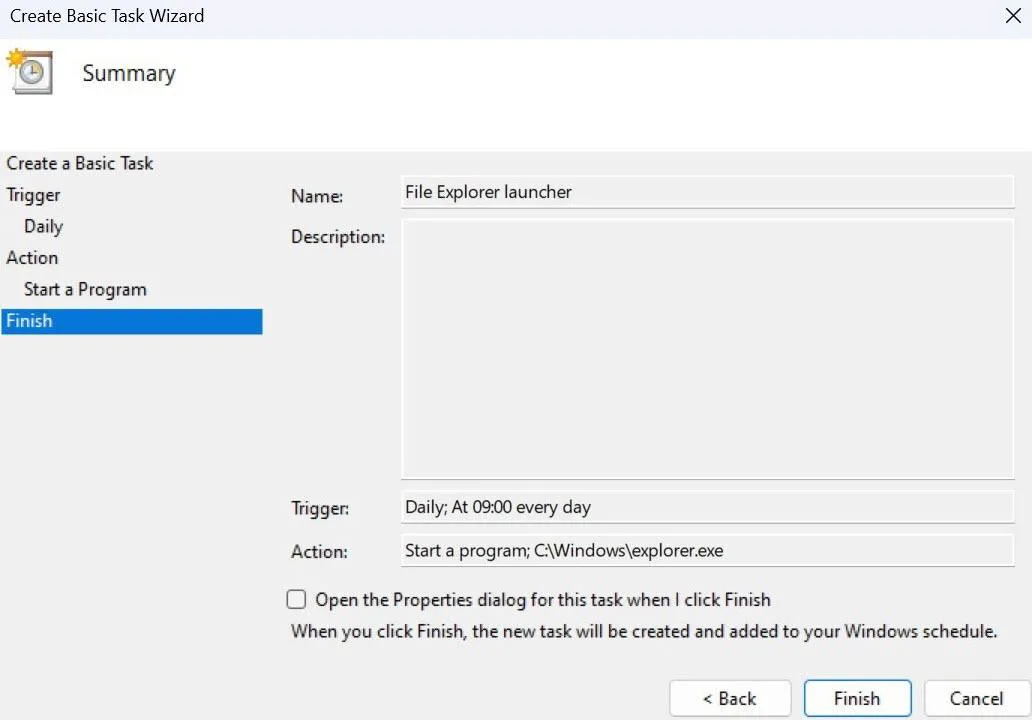
Review & Finish
Review the summary screen to ensure all settings are correct. If you’re happy with the configuration, click “Finish” to create the automated task.
The app will now launch automatically at the designated time, or as soon as your device starts up if the specified time has already passed. You can repeat this process to automate as many apps as you wish.
Automate Task Computer: Run a Command in Windows with Task Scheduler
If you’re ready to take automation to the next level, Windows lets you automate task computer. Essentially, any command you can execute in Windows PowerShell can be automated.
Let’s explore how to automatically lock your Windows device at 6 pm every workday. This is a simple way to signal the end of your workday without worrying about losing unsaved work.
- Follow steps 1-5 from the previous section to create a new folder in Task Scheduler.
- Right-click the newly created folder and select “Create Task…”.
- Name your task something descriptive, like “Windows auto-lock”.
- Under “Security options,” ensure your admin account is selected to run the task and choose whether you want it to run only when you’re logged in or not.
- Click the “Triggers” tab at the top and select “New”.
- From the “Begin the task” dropdown, choose “On a schedule” (unless you prefer a more advanced trigger).
- Specify the start time (6 pm) and frequency (weekdays).
- Customize any advanced settings as needed and click “OK”.
- Go to the “Actions” tab and click “New…”.
- Ensure “Start a program” is selected. For locking the device, enter “rundll32.exe.” For other PowerShell commands, enter “powershell”.
- In the “Add arguments” box, add the remaining part of the PowerShell command. In this case, it’s “user32.dll,LockWorkStation”.
- Click “OK” twice to save the task.
How to Automate Task Computer with Power Automate
Alternatively, Power Automate, a downloadable tool from Microsoft, can be used to automate task computer. Functioning similarly to Task Scheduler, Power Automate allows you to create scripts, including more complex ones.
1. Download Power Automate from Microsoft’s website.
2. Run the installer and follow the on-screen instructions. Sign in using your Microsoft Account.
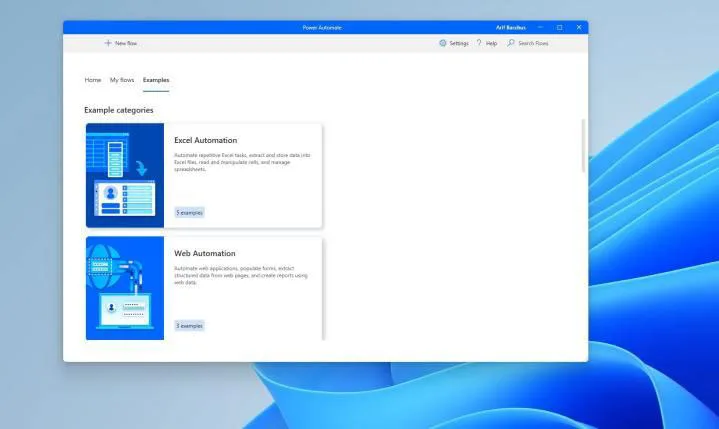
3. After installation, navigate to the “Examples” section within the app. Here, you’ll find various sample automations to get you started. The “Desktop Automation” option offers particularly helpful tips. You can customize these examples or create entirely new tasks tailored to your needs.
4. Click the pencil icon next to any example to begin editing and creating your automation. A new window will open for customization. For instance, you can choose the “Open a folder” example.

5. Under the “Main” section, click the downward-facing dots next to each step to modify it to suit your specific task.
6. Once you’ve finished editing, click the “Save as” option at the top of the window to save your automation.
7. Close the editing window, and your newly created automation will appear in the “My flows” section within the main Power Automate app.
While Task Scheduler and Power Automate are two user-friendly options to automate task computer, they aren’t the only solutions available. Although both are free, you might also consider paid applications like Simple Macro Recorder or JitBit Macro Recorder, which specialize in building macros for more complex automation needs.
Read more: