We understand that automating screenshots on a web page may be exactly what you need. As you may already know, taking screenshots on a website is one of the 25 features available in the browser function of RPA CLOUD.
In this article, we will provide a comprehensive step-by-step guide to help you successfully automate screenshots on a web page. Our aim is to ensure that you can confidently and effectively automate this task.
Step 1: Open the target browser
After creating your robot, please refer to step 3-1 at here if you are unsure about how to create a robot.
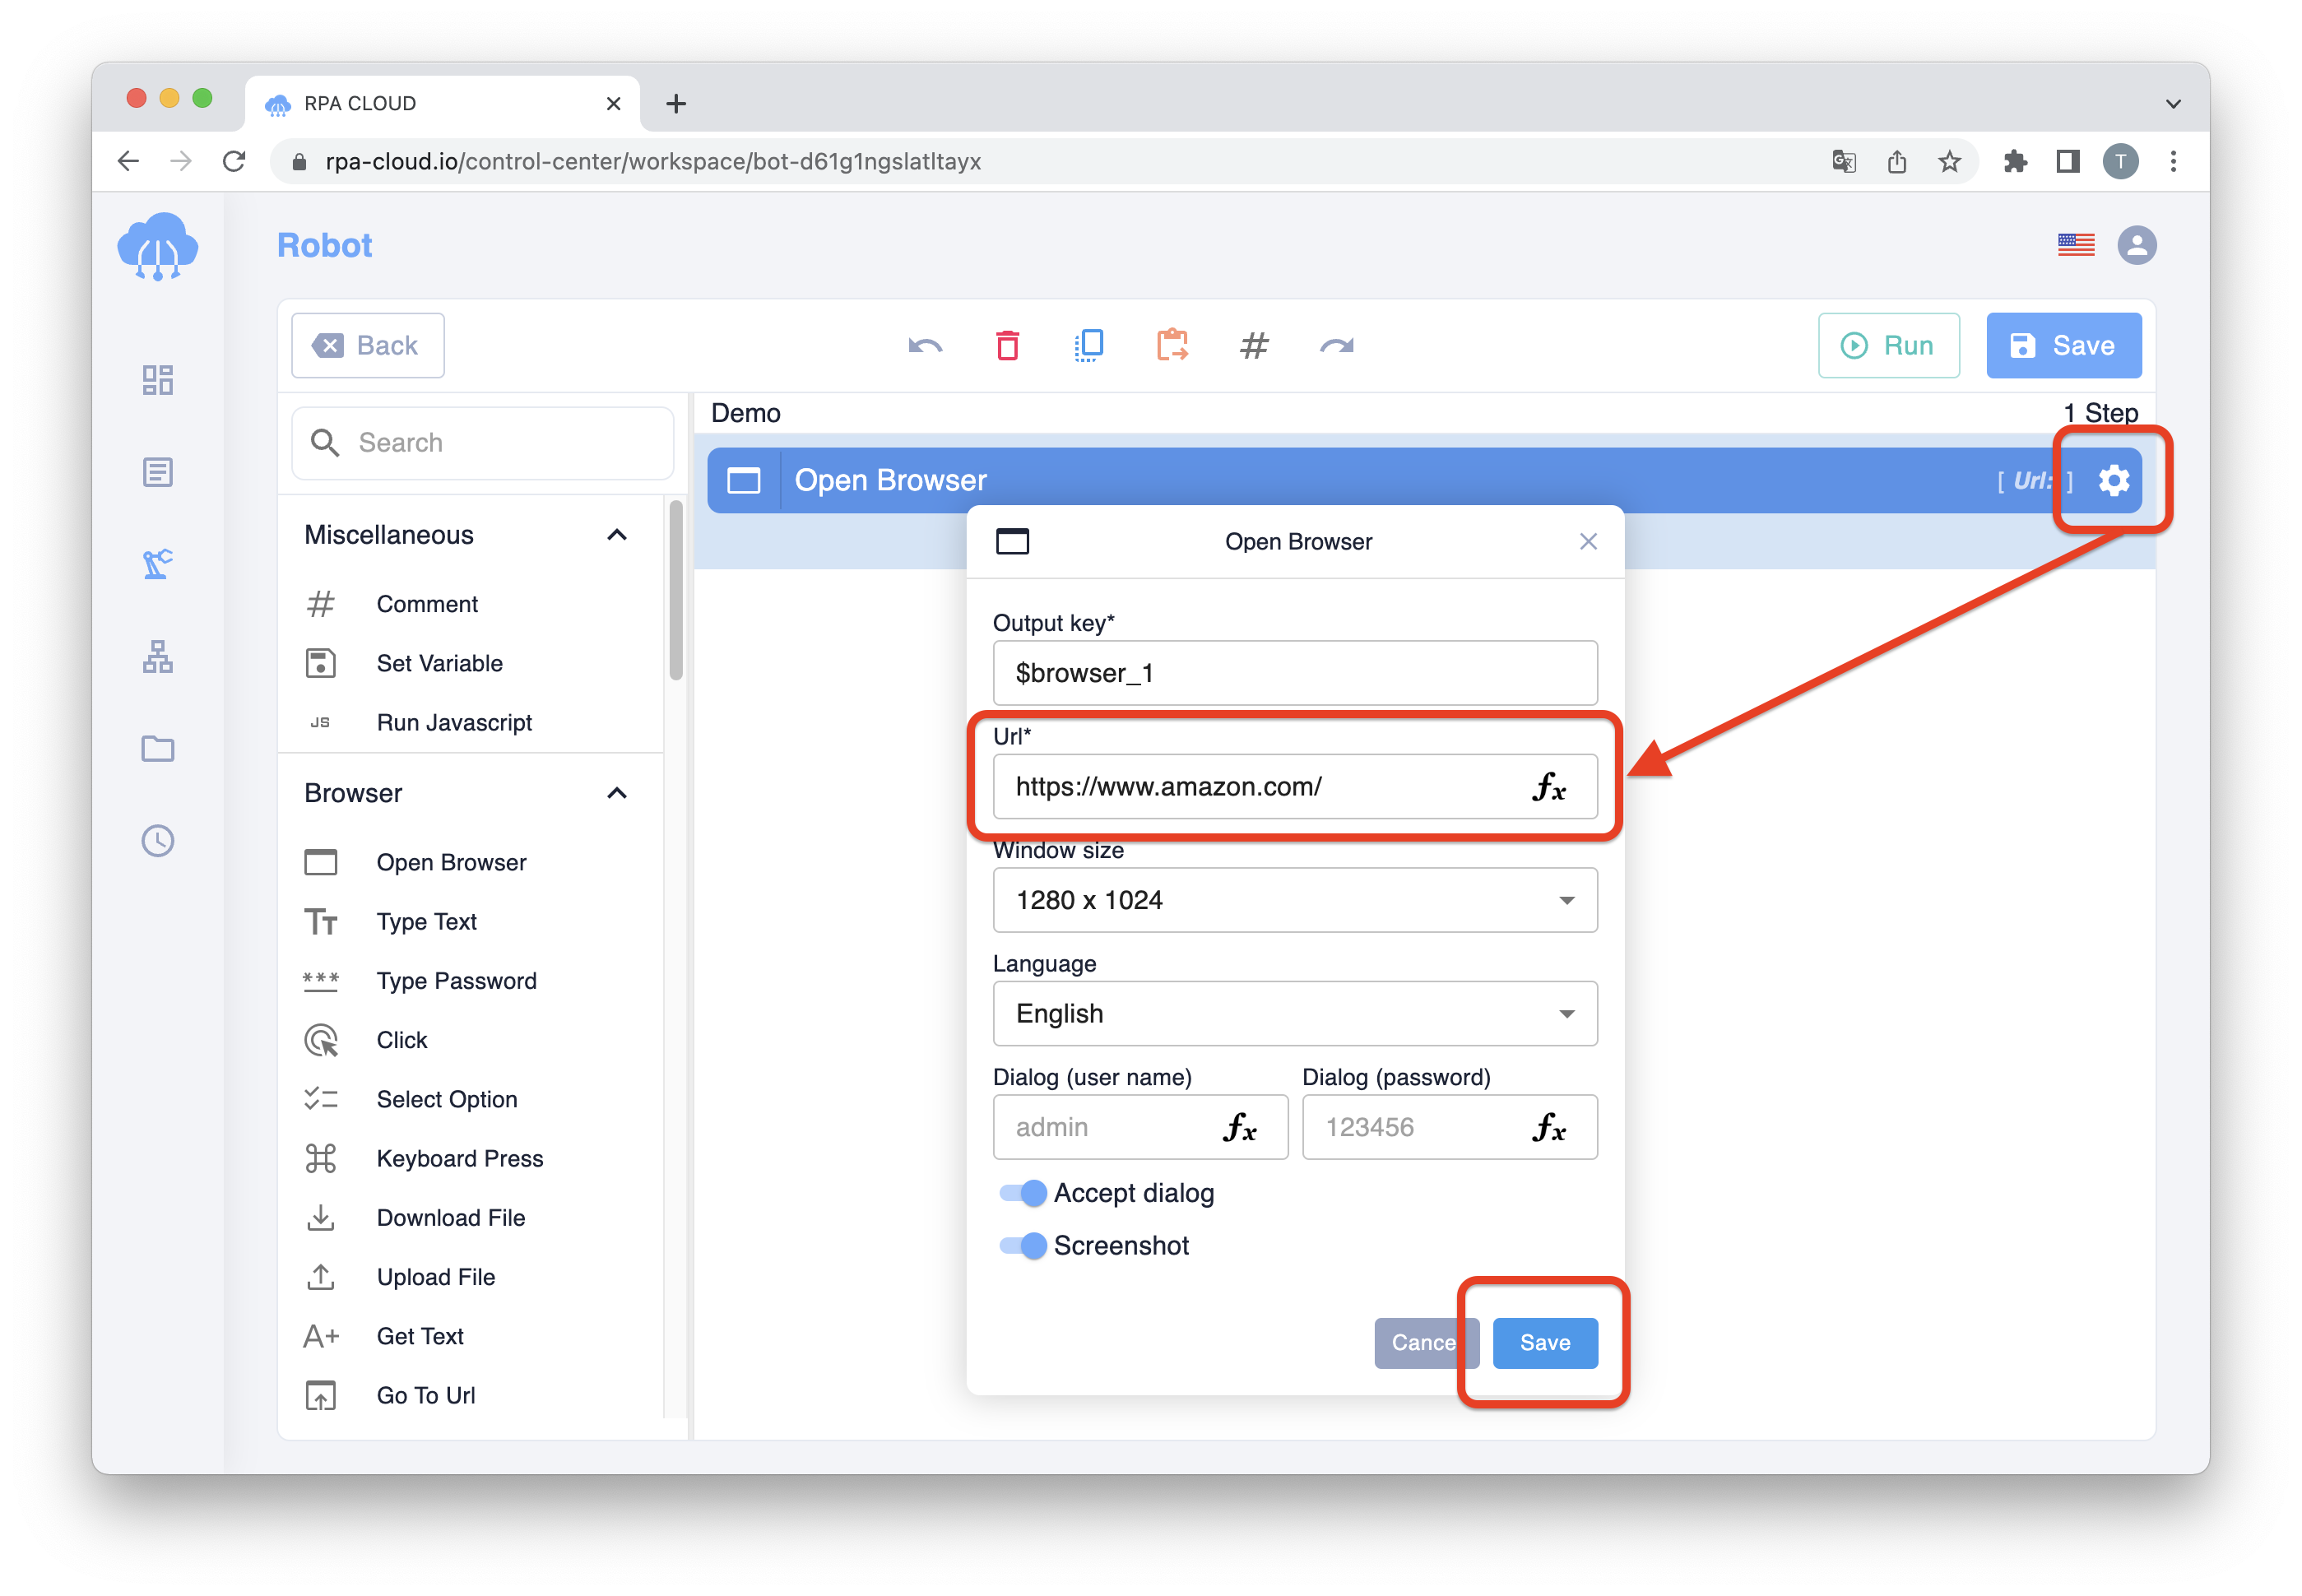
To open the browser, hold and drag the [Open Browser] action. Then, click on the gear icon to open the dialog box.
In the dialog box, you can input the URL of the website you want to open. For example, if you want to open the website https://blog.rpa-cloud.io/, you can input this URL in the Url field.
Step 2: Take the screenshot
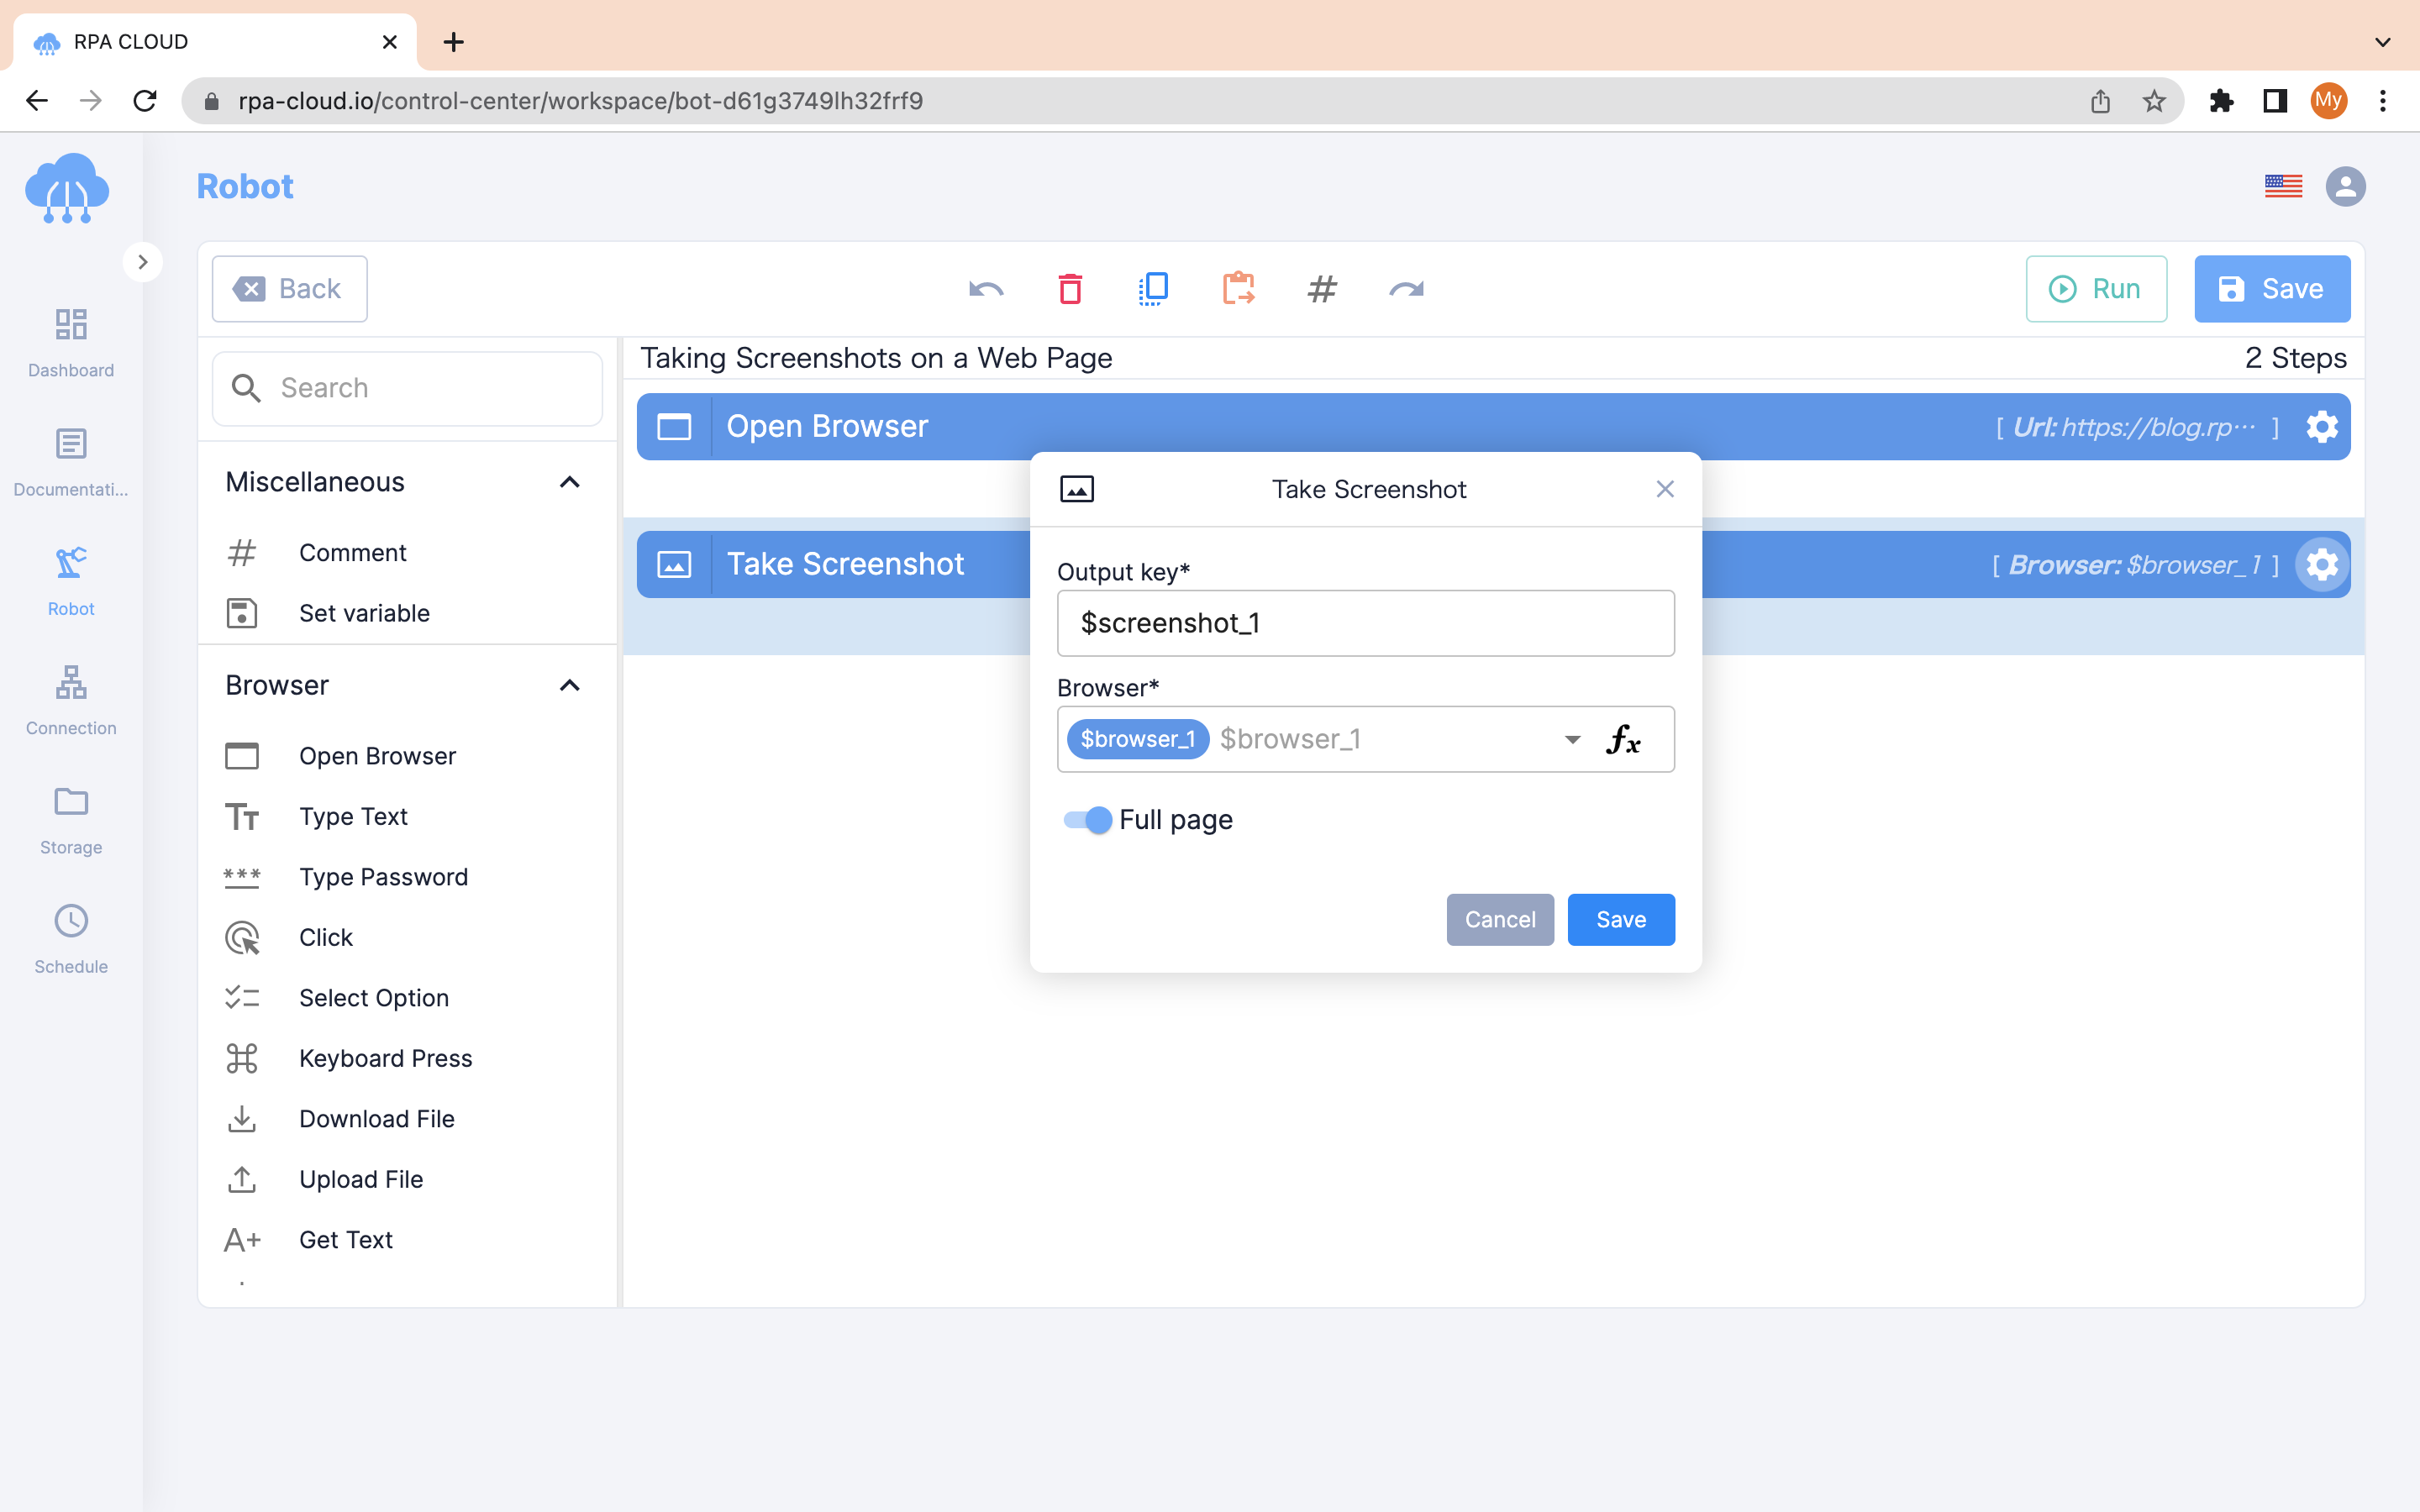
To take a screenshot, hold and drag the “Take screenshot” action.
By default, the screenshot will capture the entire visible area of the web page.
However, if you switch off the “Full page” option, the screenshot will be taken only of the currently visible portion of the web page.
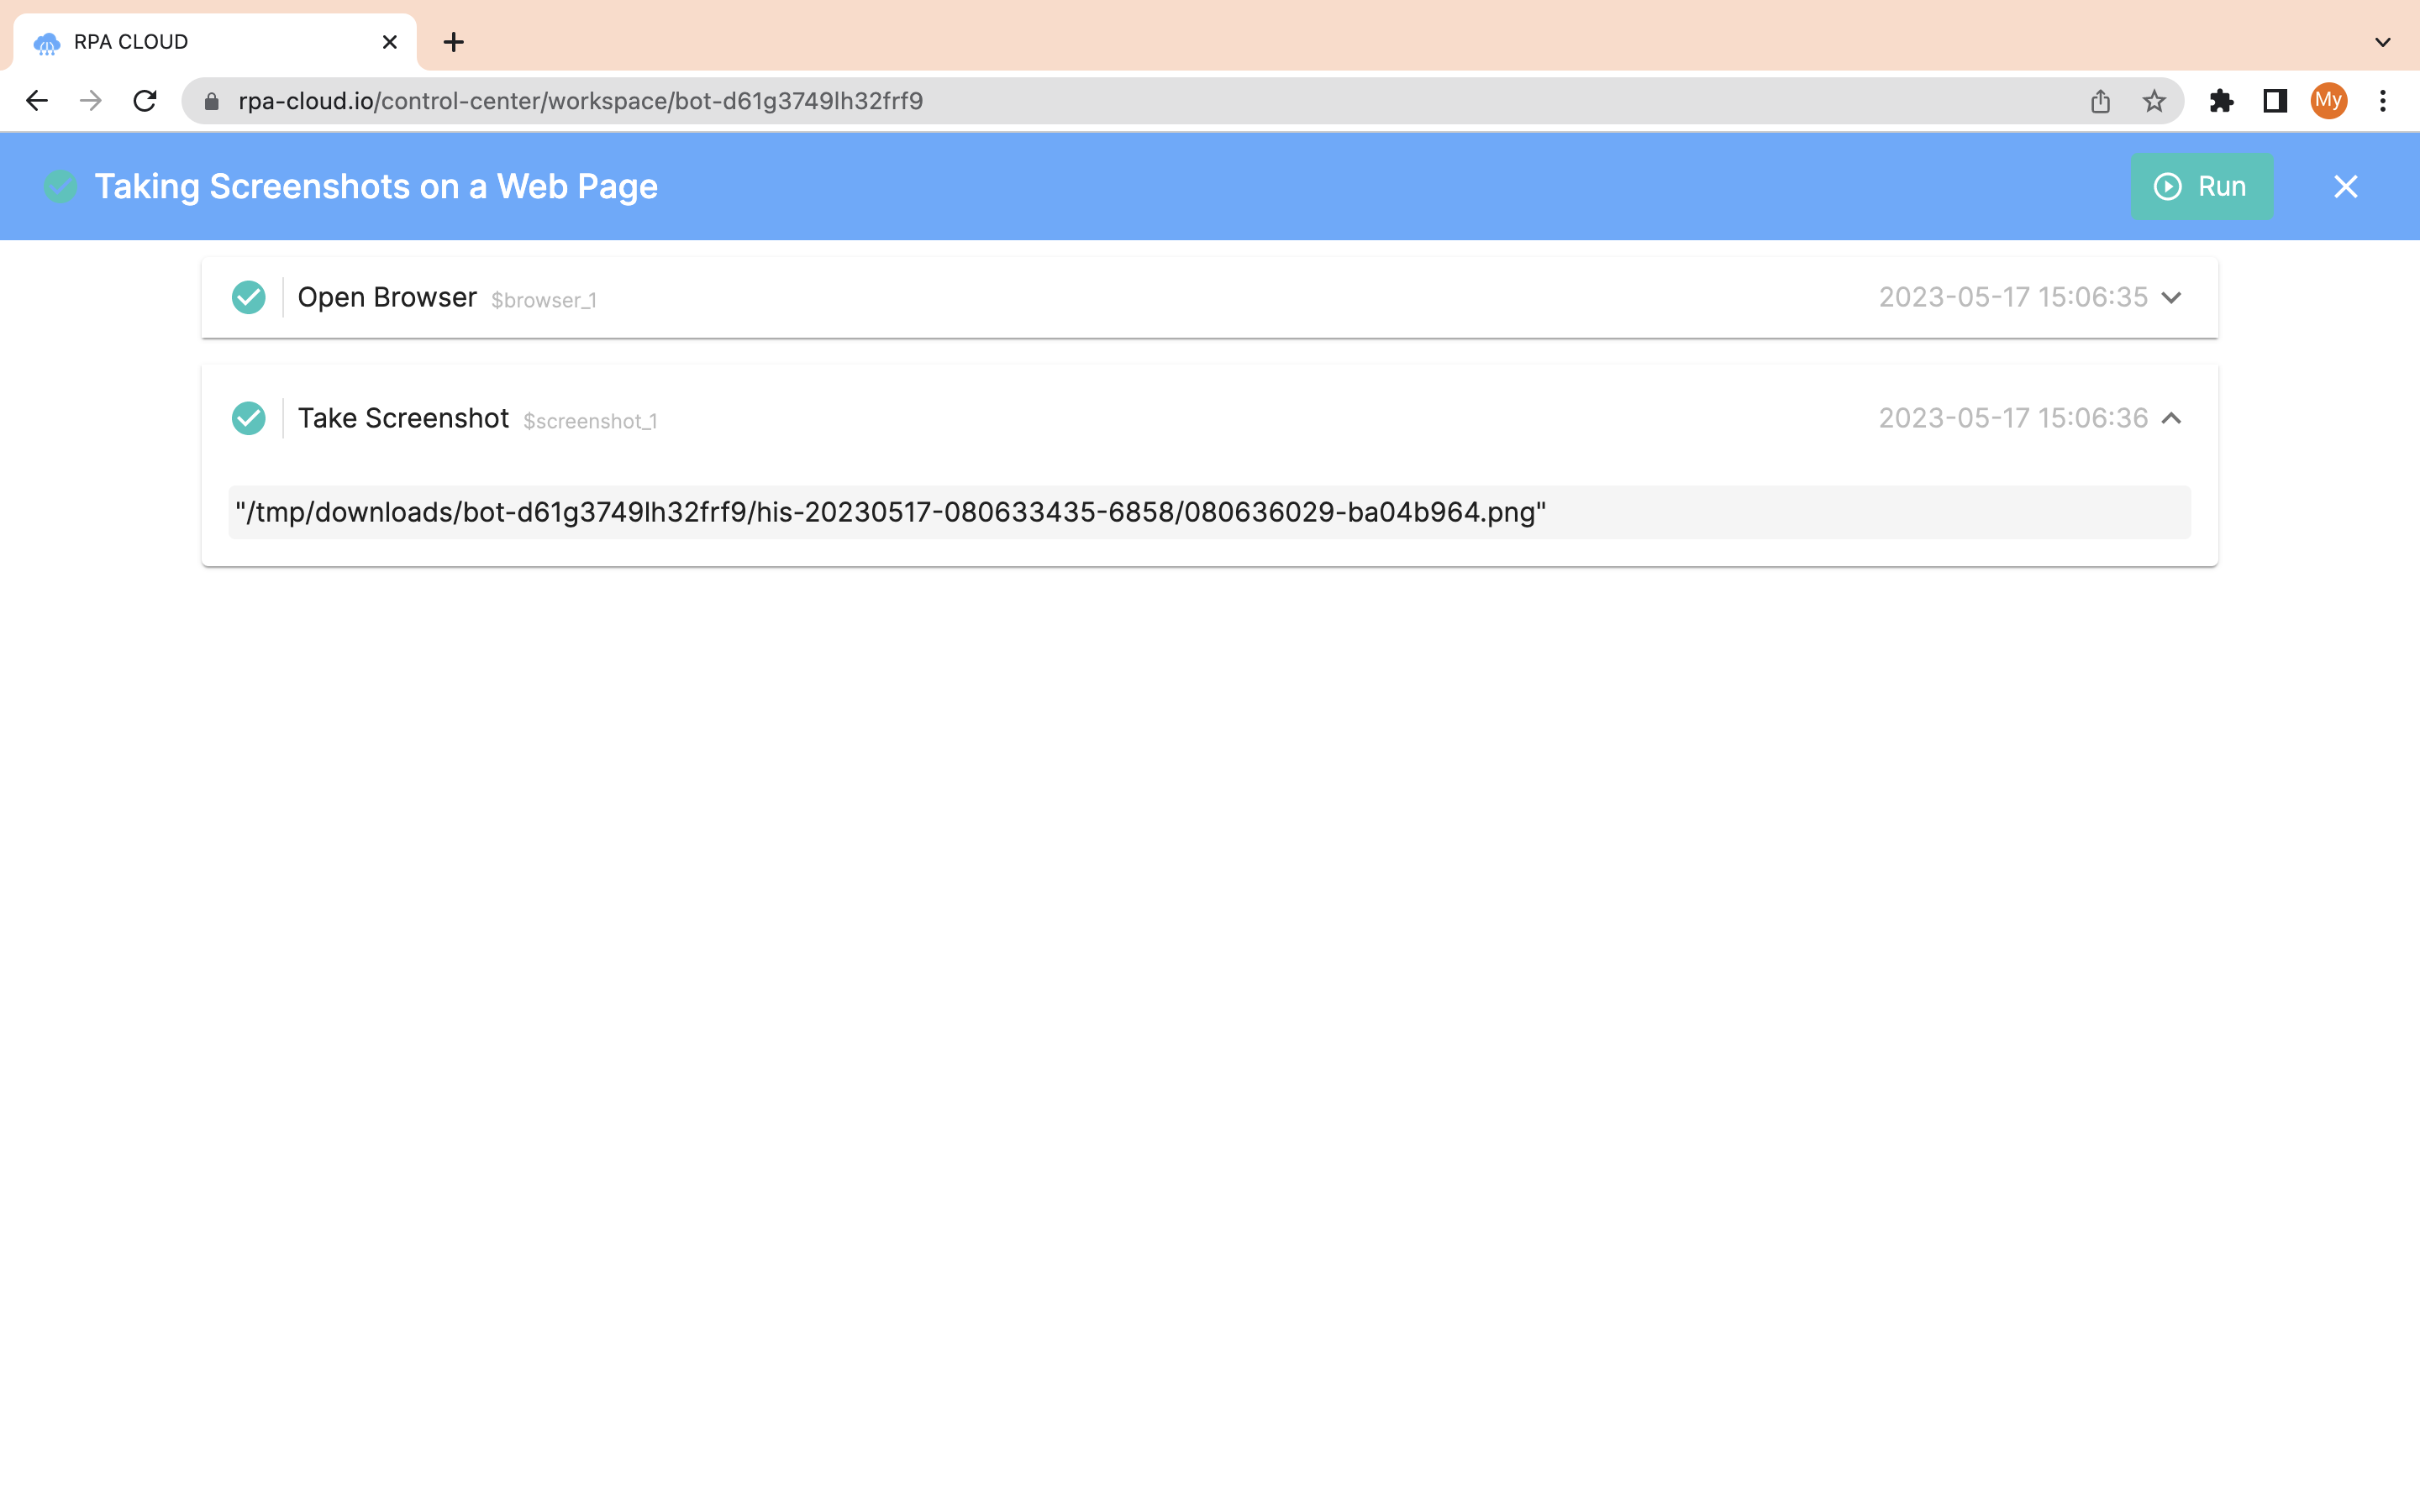
Step 3: Run the robot to test
After running the robot successfully, you will see a path where you can archive your screenshot.

Now, if you want to take a screenshot at a specific time, you can set a schedule for the robot.