While it’s true that various methods on how to import web data into Excel, the real challenge lies in the manual effort involved.You often find yourself opening web pages, Excel files, or clicking the refresh button repeatedly.
What if there was a way to automate all of this?
Enter RPA CLOUD – your solution to seamless and effortless data importation. Let’s explore the incredible efficiency that RPA CLOUD brings to importing data from the web to Excel!
Import Web Data into Excel manually
Method 1: Import Data from Web
- Open Excel: Open Microsoft Excel on your computer.
- Go to the Data Tab: Navigate to the “Data” tab on the Excel ribbon.
- From Web: Click on “From Web” in the “Get External Data” or “Get Data” group.
- Enter URL: Enter the URL of the website from which you want to import data and click “OK.”
- Navigate and Select Data: Excel will open a new window where you can navigate the website. Click on the data you want to import. You’ll see a yellow arrow next to the data you’ve selected.
- Import Data: Click on the yellow arrow, and then click “Import.” Choose the location where you want to place the data (e.g., a new worksheet) and click “OK.”
Method 2: Copy and Paste
- Open Web Page: Open the web page containing the data you want to import.
- Select and Copy Data: Highlight the data you want to import, right-click, and choose “Copy” or use
Ctrl+C(Windows) orCommand+C(Mac). - Open Excel: Open Excel and go to the worksheet where you want to paste the data.
- Paste Data: Right-click on the cell where you want to start the data, and choose “Paste” or use
Ctrl+V(Windows) orCommand+V(Mac).
Method 3: Web Query
- Open Excel: Open Excel and go to the “Data” tab.
- New Query: Click on “Get Data” or “New Query” and select “From Other Sources,” then choose “From Web.”
- Enter URL: Enter the URL of the website and click “OK.”
- Navigate and Select Data: Excel will open a new window. Navigate to the data you want, and select it. Click “Load” to import the data.
These steps are a general guide, and the exact options and steps might differ slightly based on your version of Excel. Always check the Excel version you are using for any variations in the steps.
Using RPA CLOUD to automatically import data into Excel
- Open Browser: Choose “Open Browser” to access your desired website.
- Extract Data From Table: Copy the CSS Selector of the table on the web from which you want to extract data. If you’re unsure about CSS Selector and how to obtain it, please refer to this article.
- Create New File excel: Utilize this step to generate an Excel file for inputting the data obtained in step 2.
- Select Sheet Excel: Pick the sheet where you wish to input the data. The default sheet name is “Sheet,” but feel free to customize it.
- Write range: Finally, opt for the “Write Range” step to input the data obtained in step
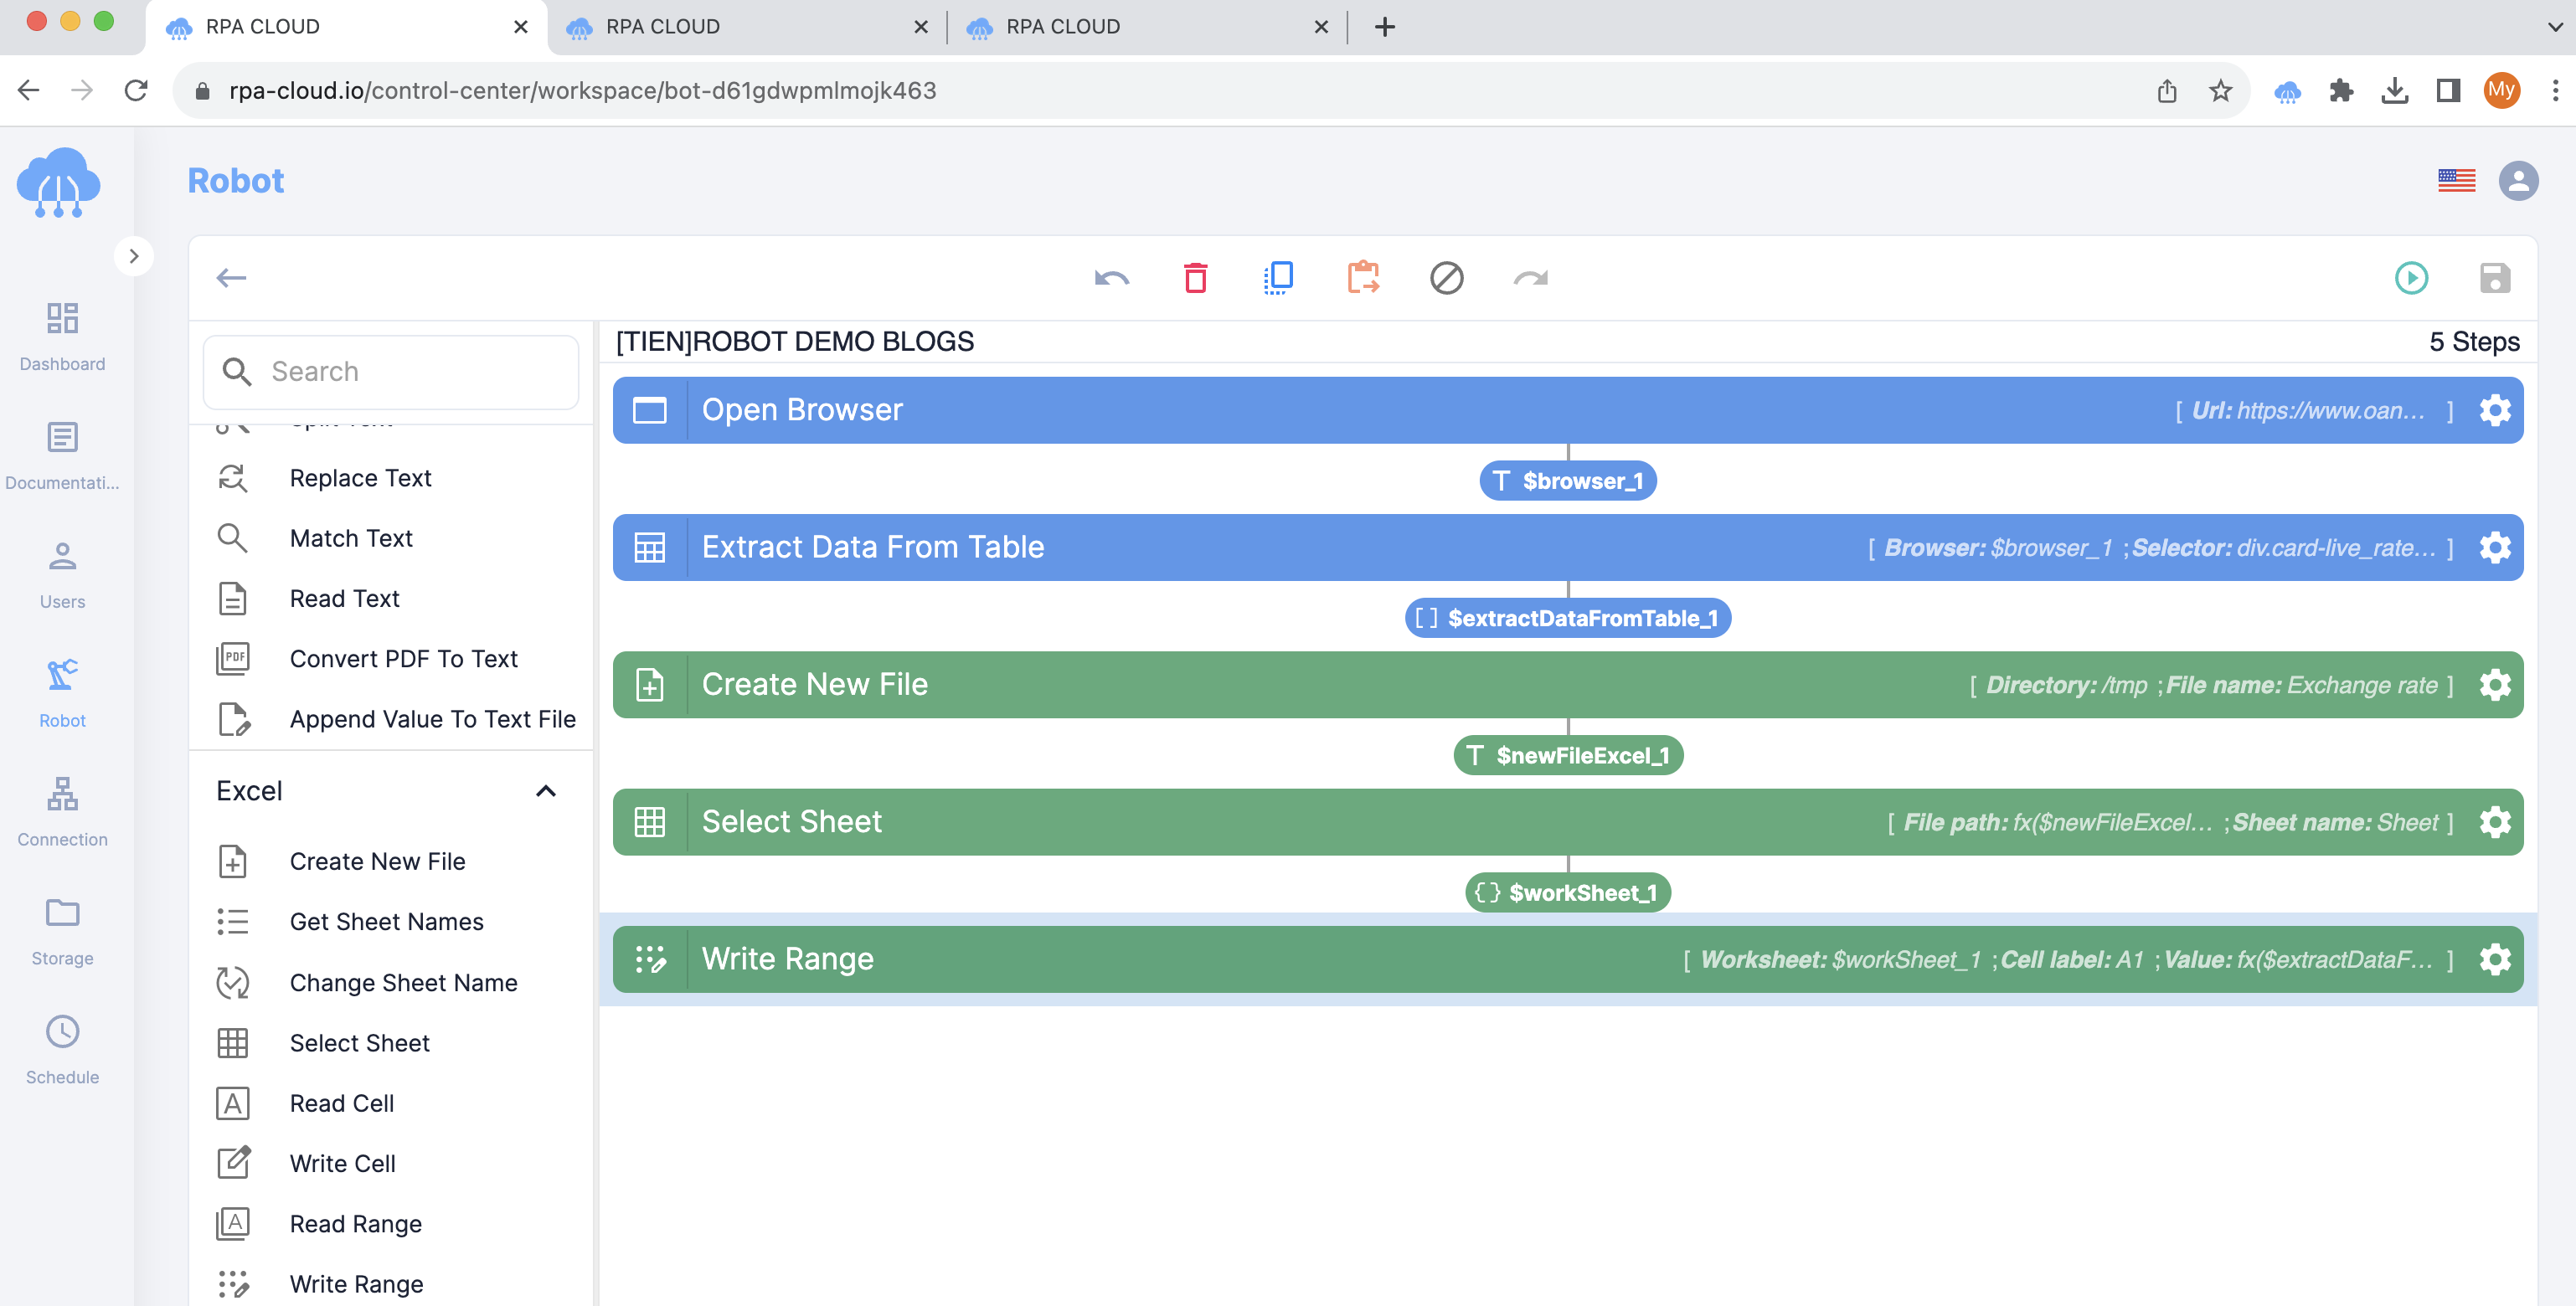
Now, with just five straightforward steps, you can observe the following results:
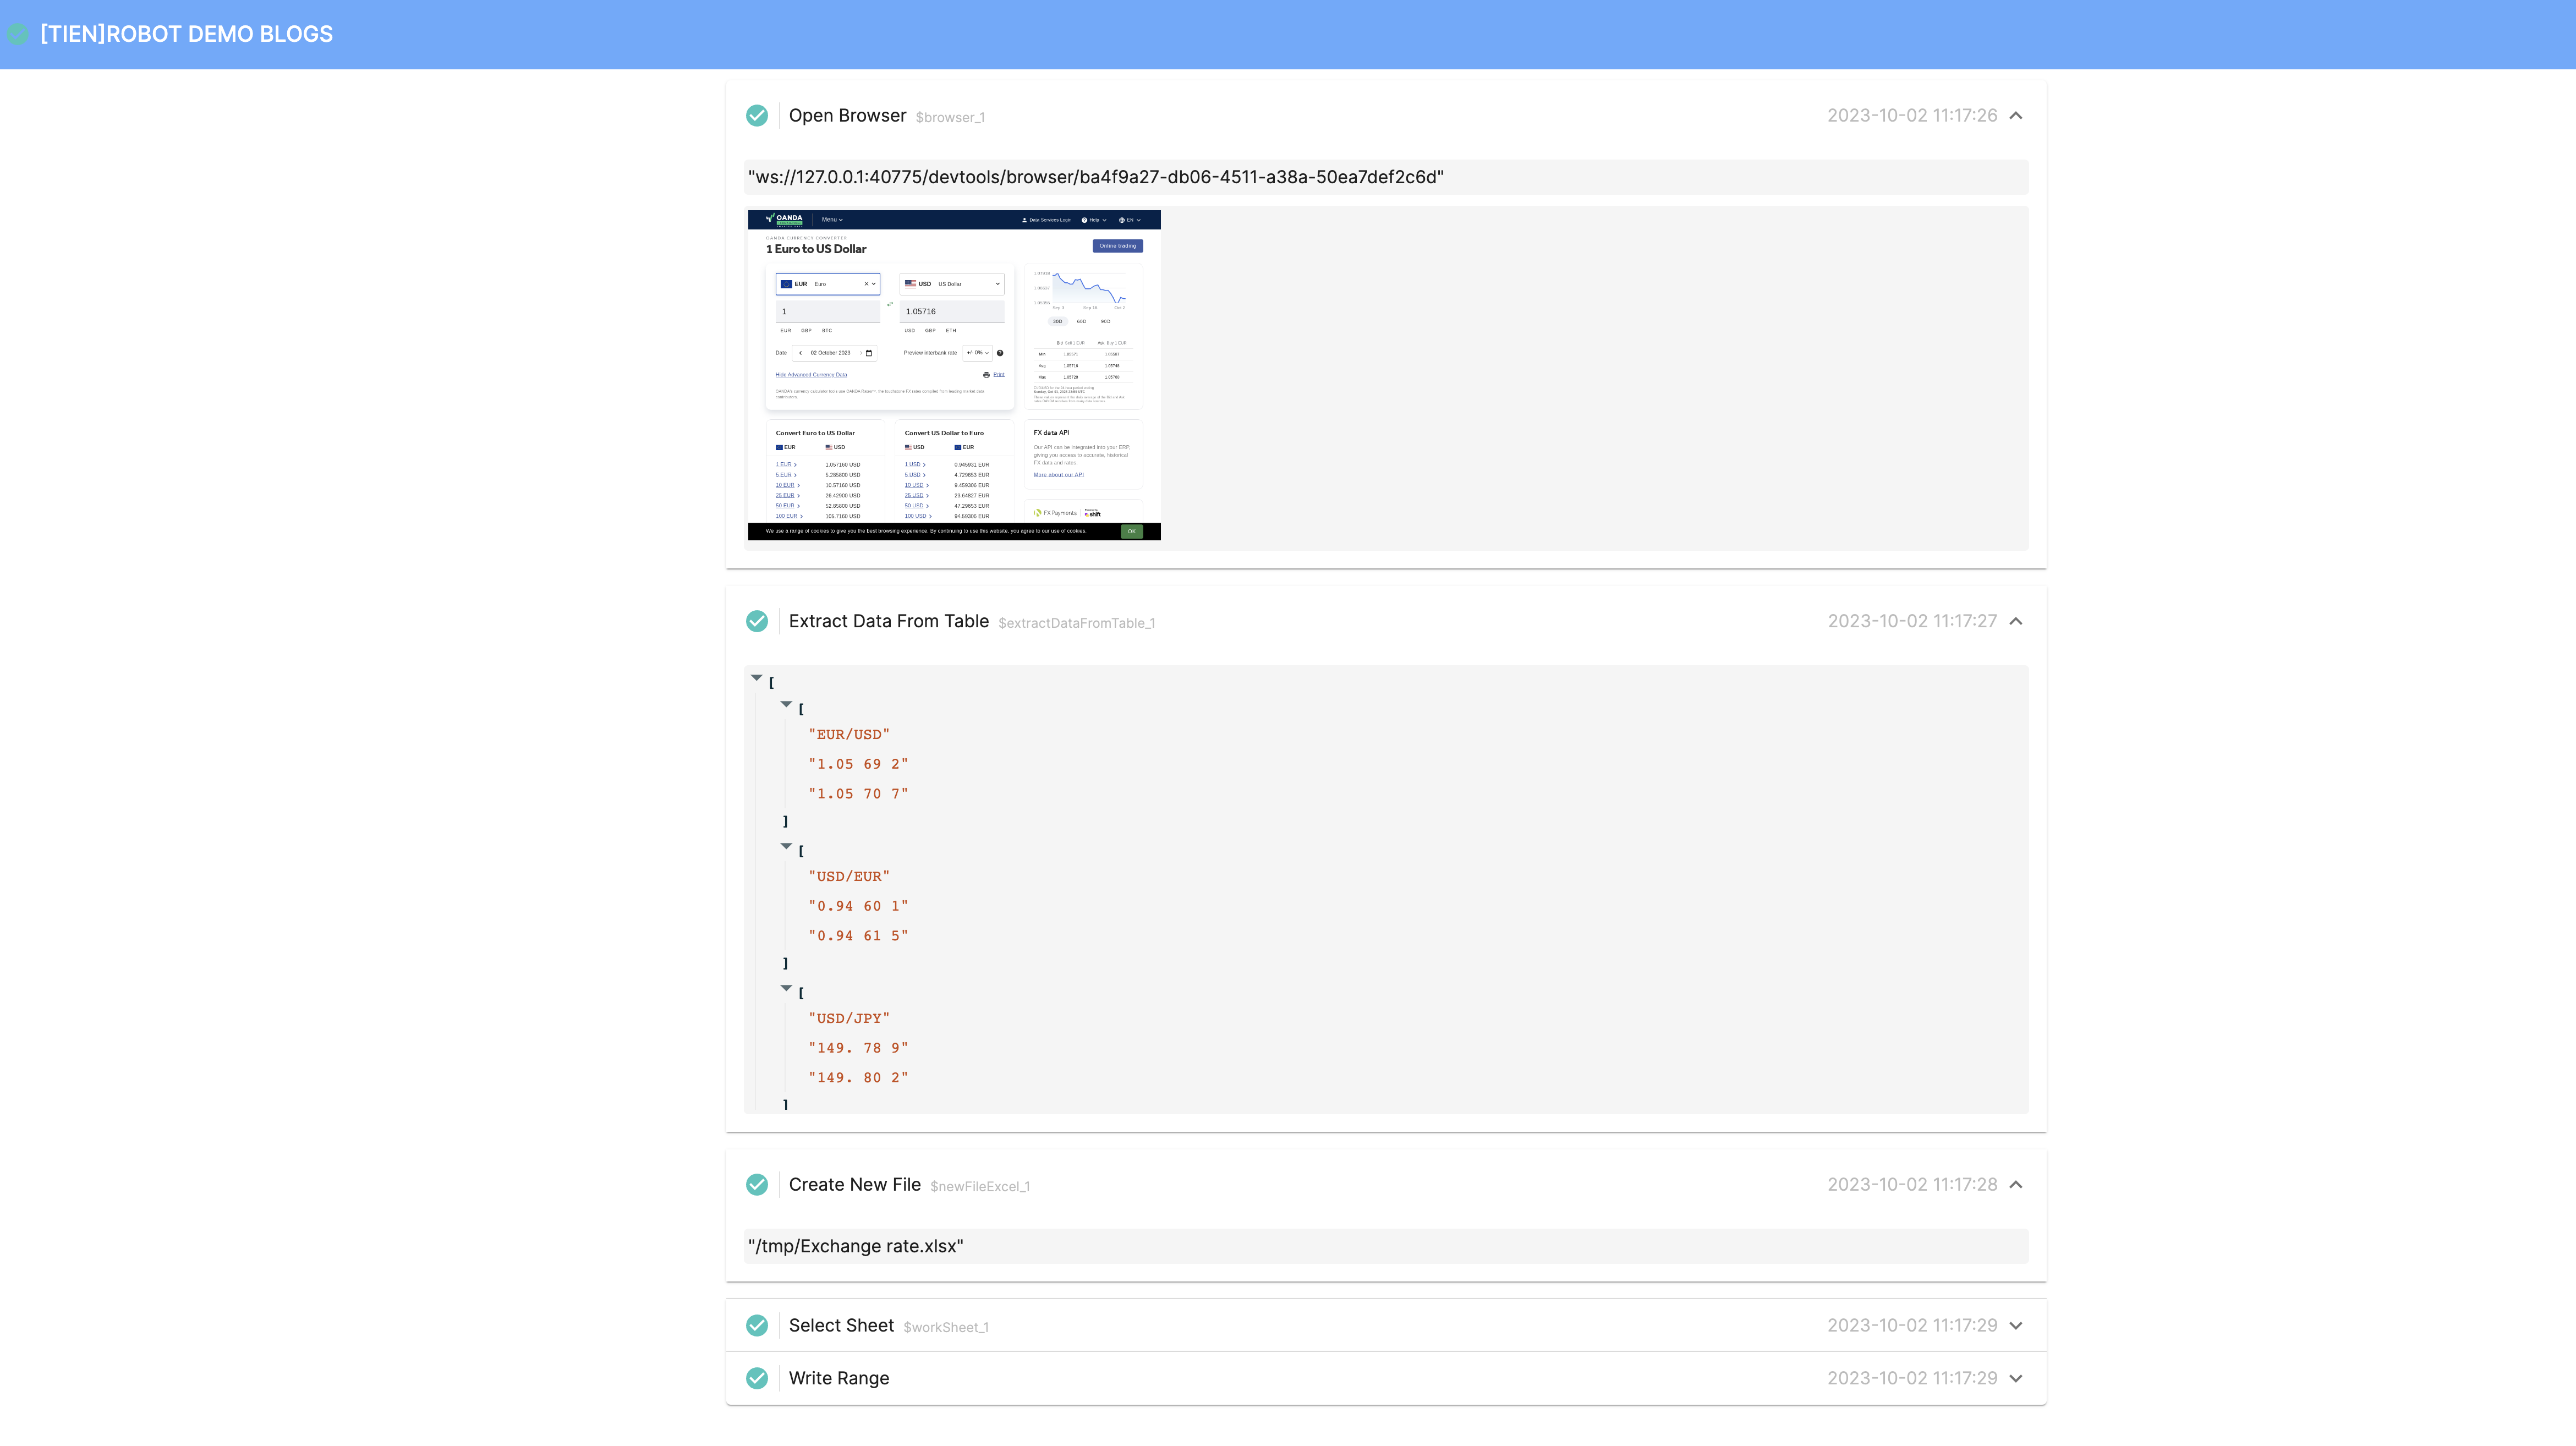
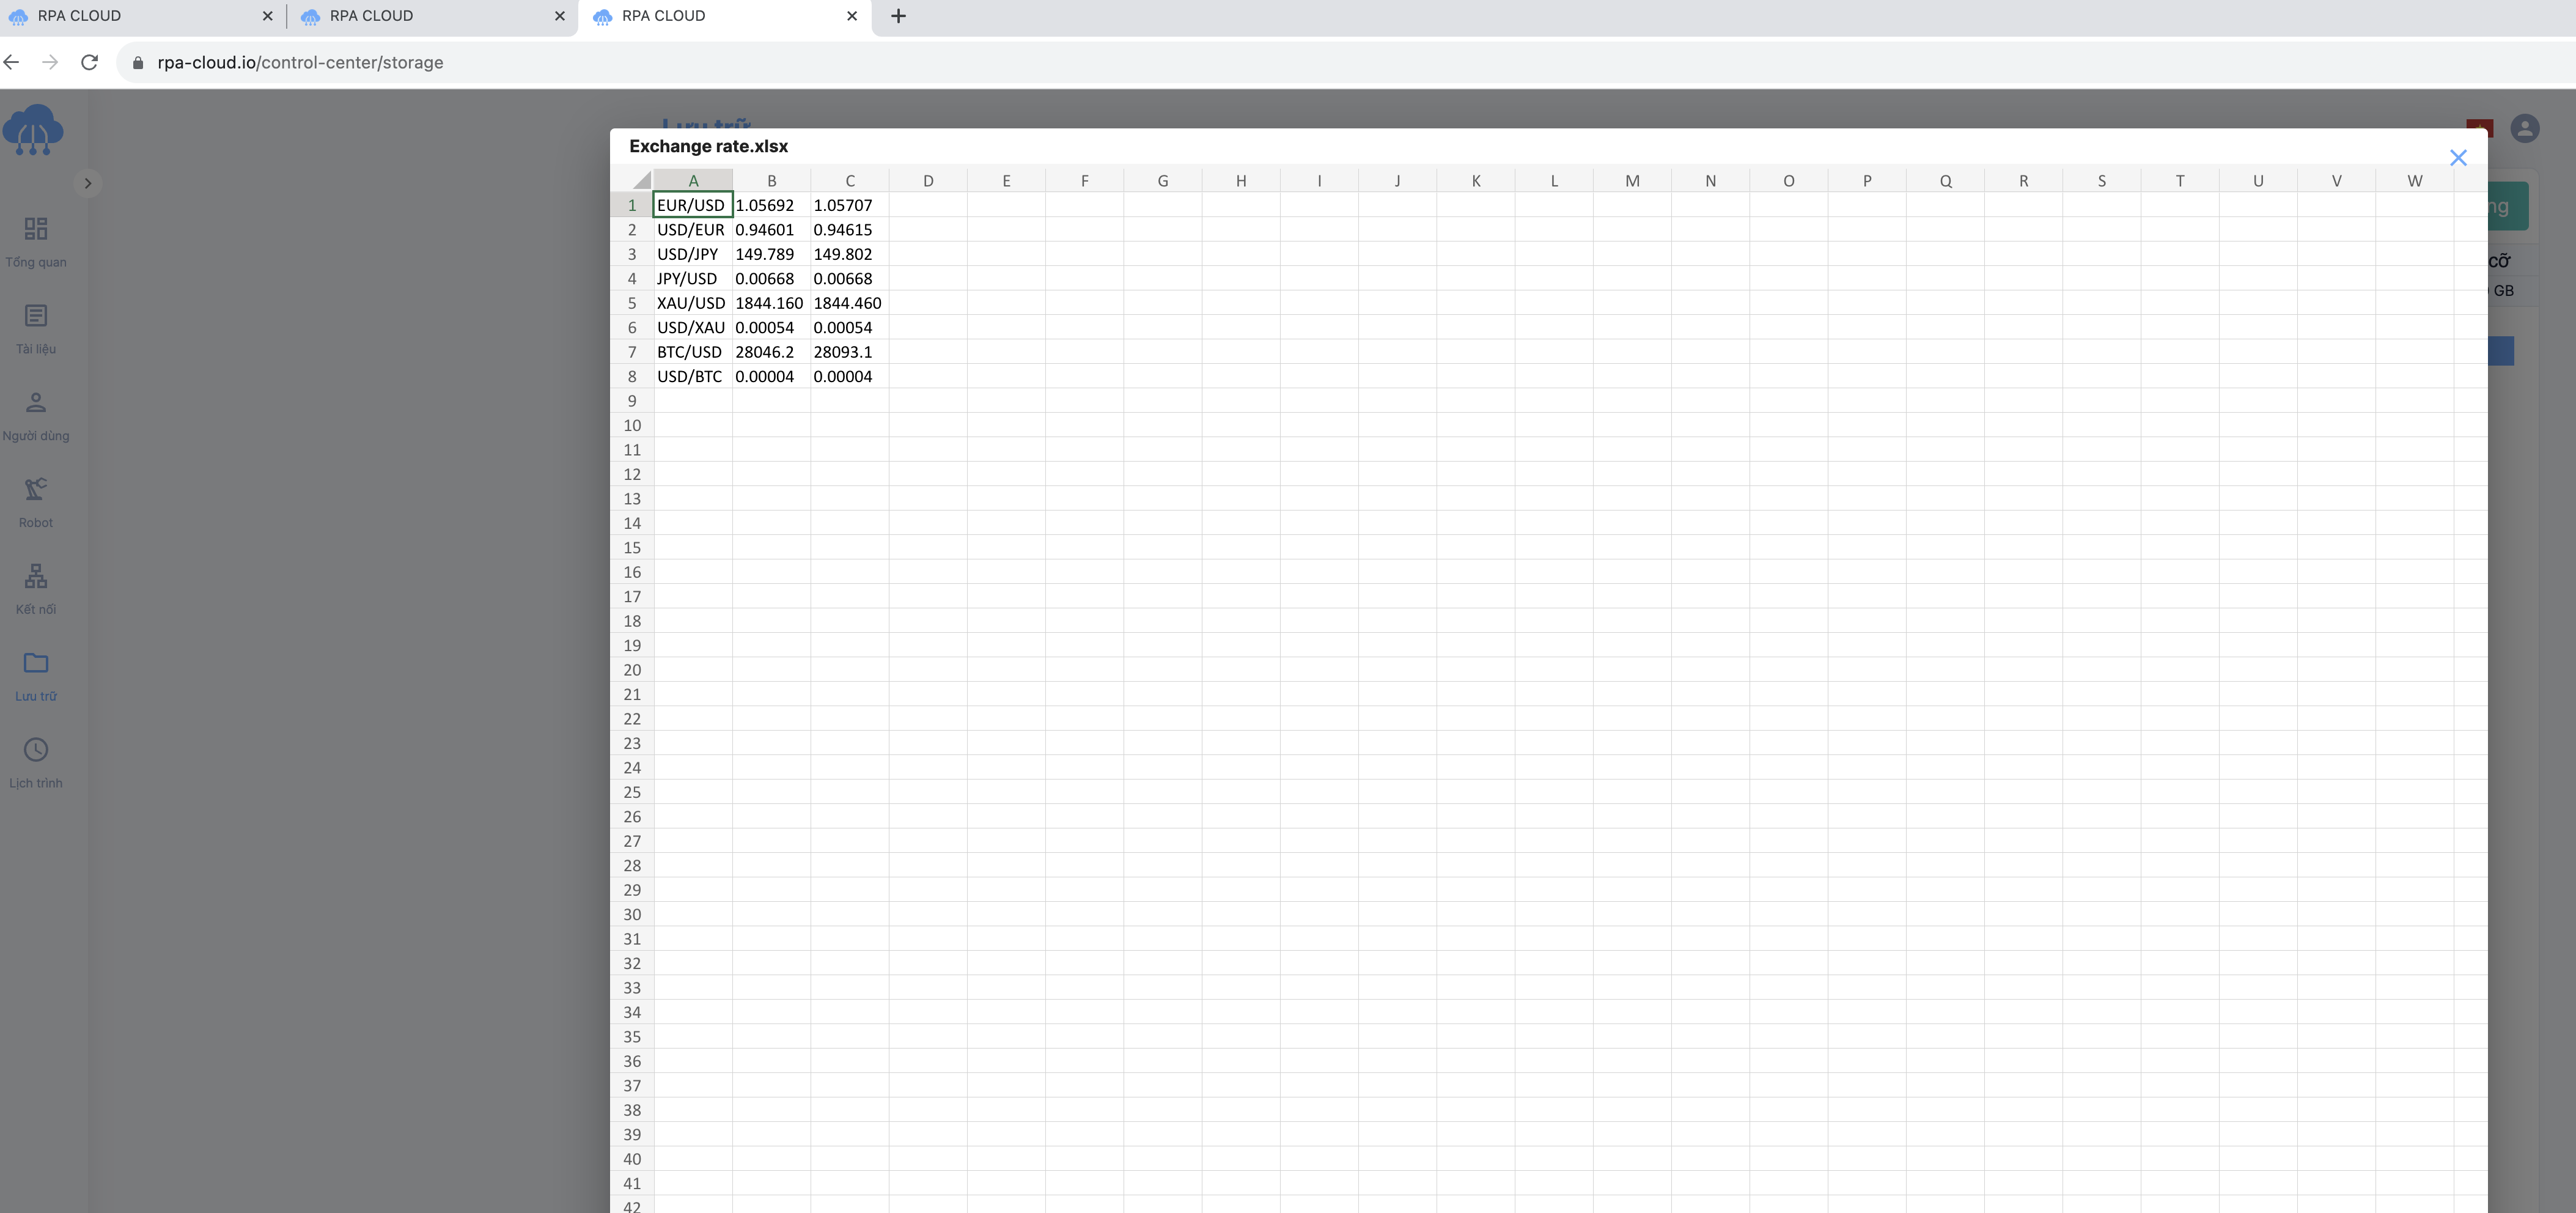
After ensuring that your robot has executed correctly, you can set a schedule for the robot to run at your preferred time.
Experience the unmatched power of automation with RPA CLOUD. Unlock efficiency, save time, and boost productivity—all at an incredibly affordable price you won’t find anywhere else. Join hands with our dedicated and supportive team to make your automation journey seamless. Don’t wait; seize the opportunity. Use RPA CLOUD now and transform the way you work!
Read more:


