When utilizing an automated task robot to optimize your work processes, one of the key advantages is the capability to establish a schedule for its operations. This scheduling feature not only conserves time but also reduces costs. By configuring automated task robots to function during off-peak hours, such as overnight or on weekends when your business is idle, you liberate your team to concentrate on primary responsibilities during regular work hours. This leads to heightened efficiency, elevated quality, and diminished expenses.
In this article, I’ll guide you on how to set up schedules for your automated task robot. Follow these uncomplicated steps to automate tasks and obtain results whenever you require them.
Steps to set schedule for robot
Step 1: Click the link https://rpa-cloud.io/control-center/schedule to start
Step 2: Click the [Add new] button, choose the robot you set up your work, then click Next
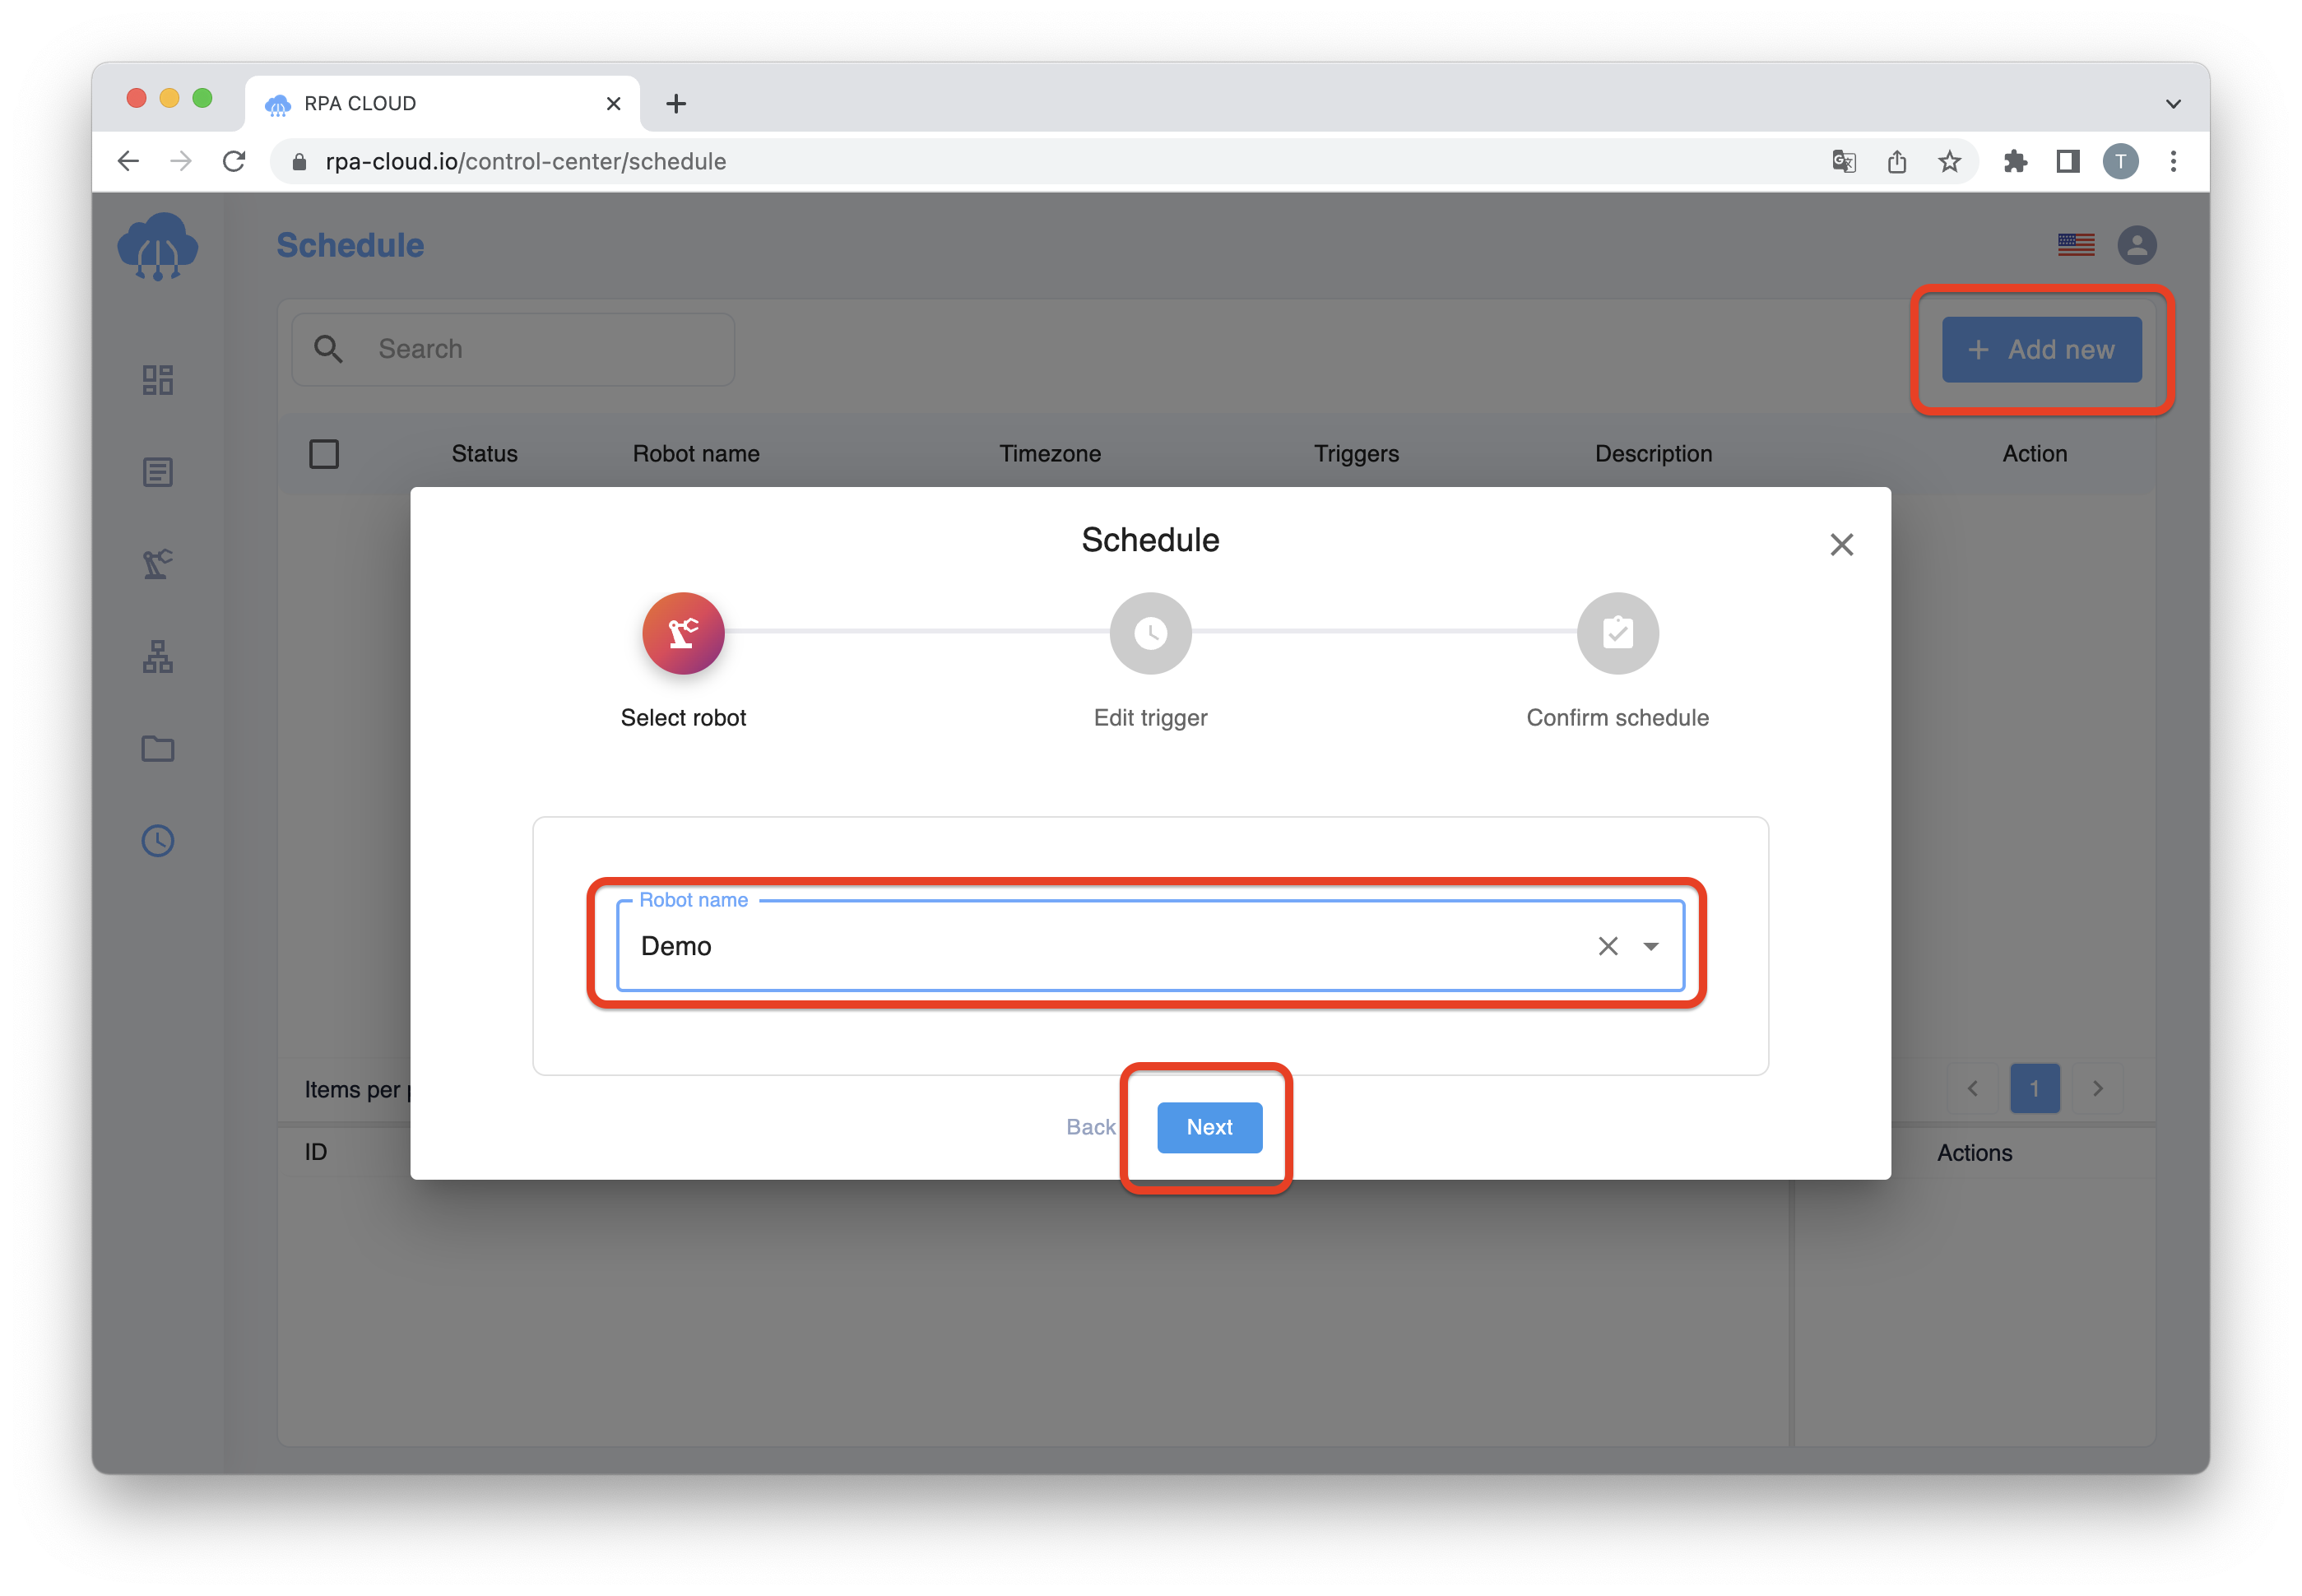
Step 3: Set the timezone and click the [Next] button.
![Step 3: Set the timezone and click the [Next] button.](https://blog.rpa-cloud.io/wp-content/uploads/2023/05/scheduleRobotRun_2.298df9adf845a58d793f-1.png)
Step 4: Confirm the schedule and click the [OK] button.
![Step 4: Confirm the schedule and click the [OK] button.](https://blog.rpa-cloud.io/wp-content/uploads/2023/05/scheduleRobotRun_3.c2e9edd451cb4cd203b3.png)
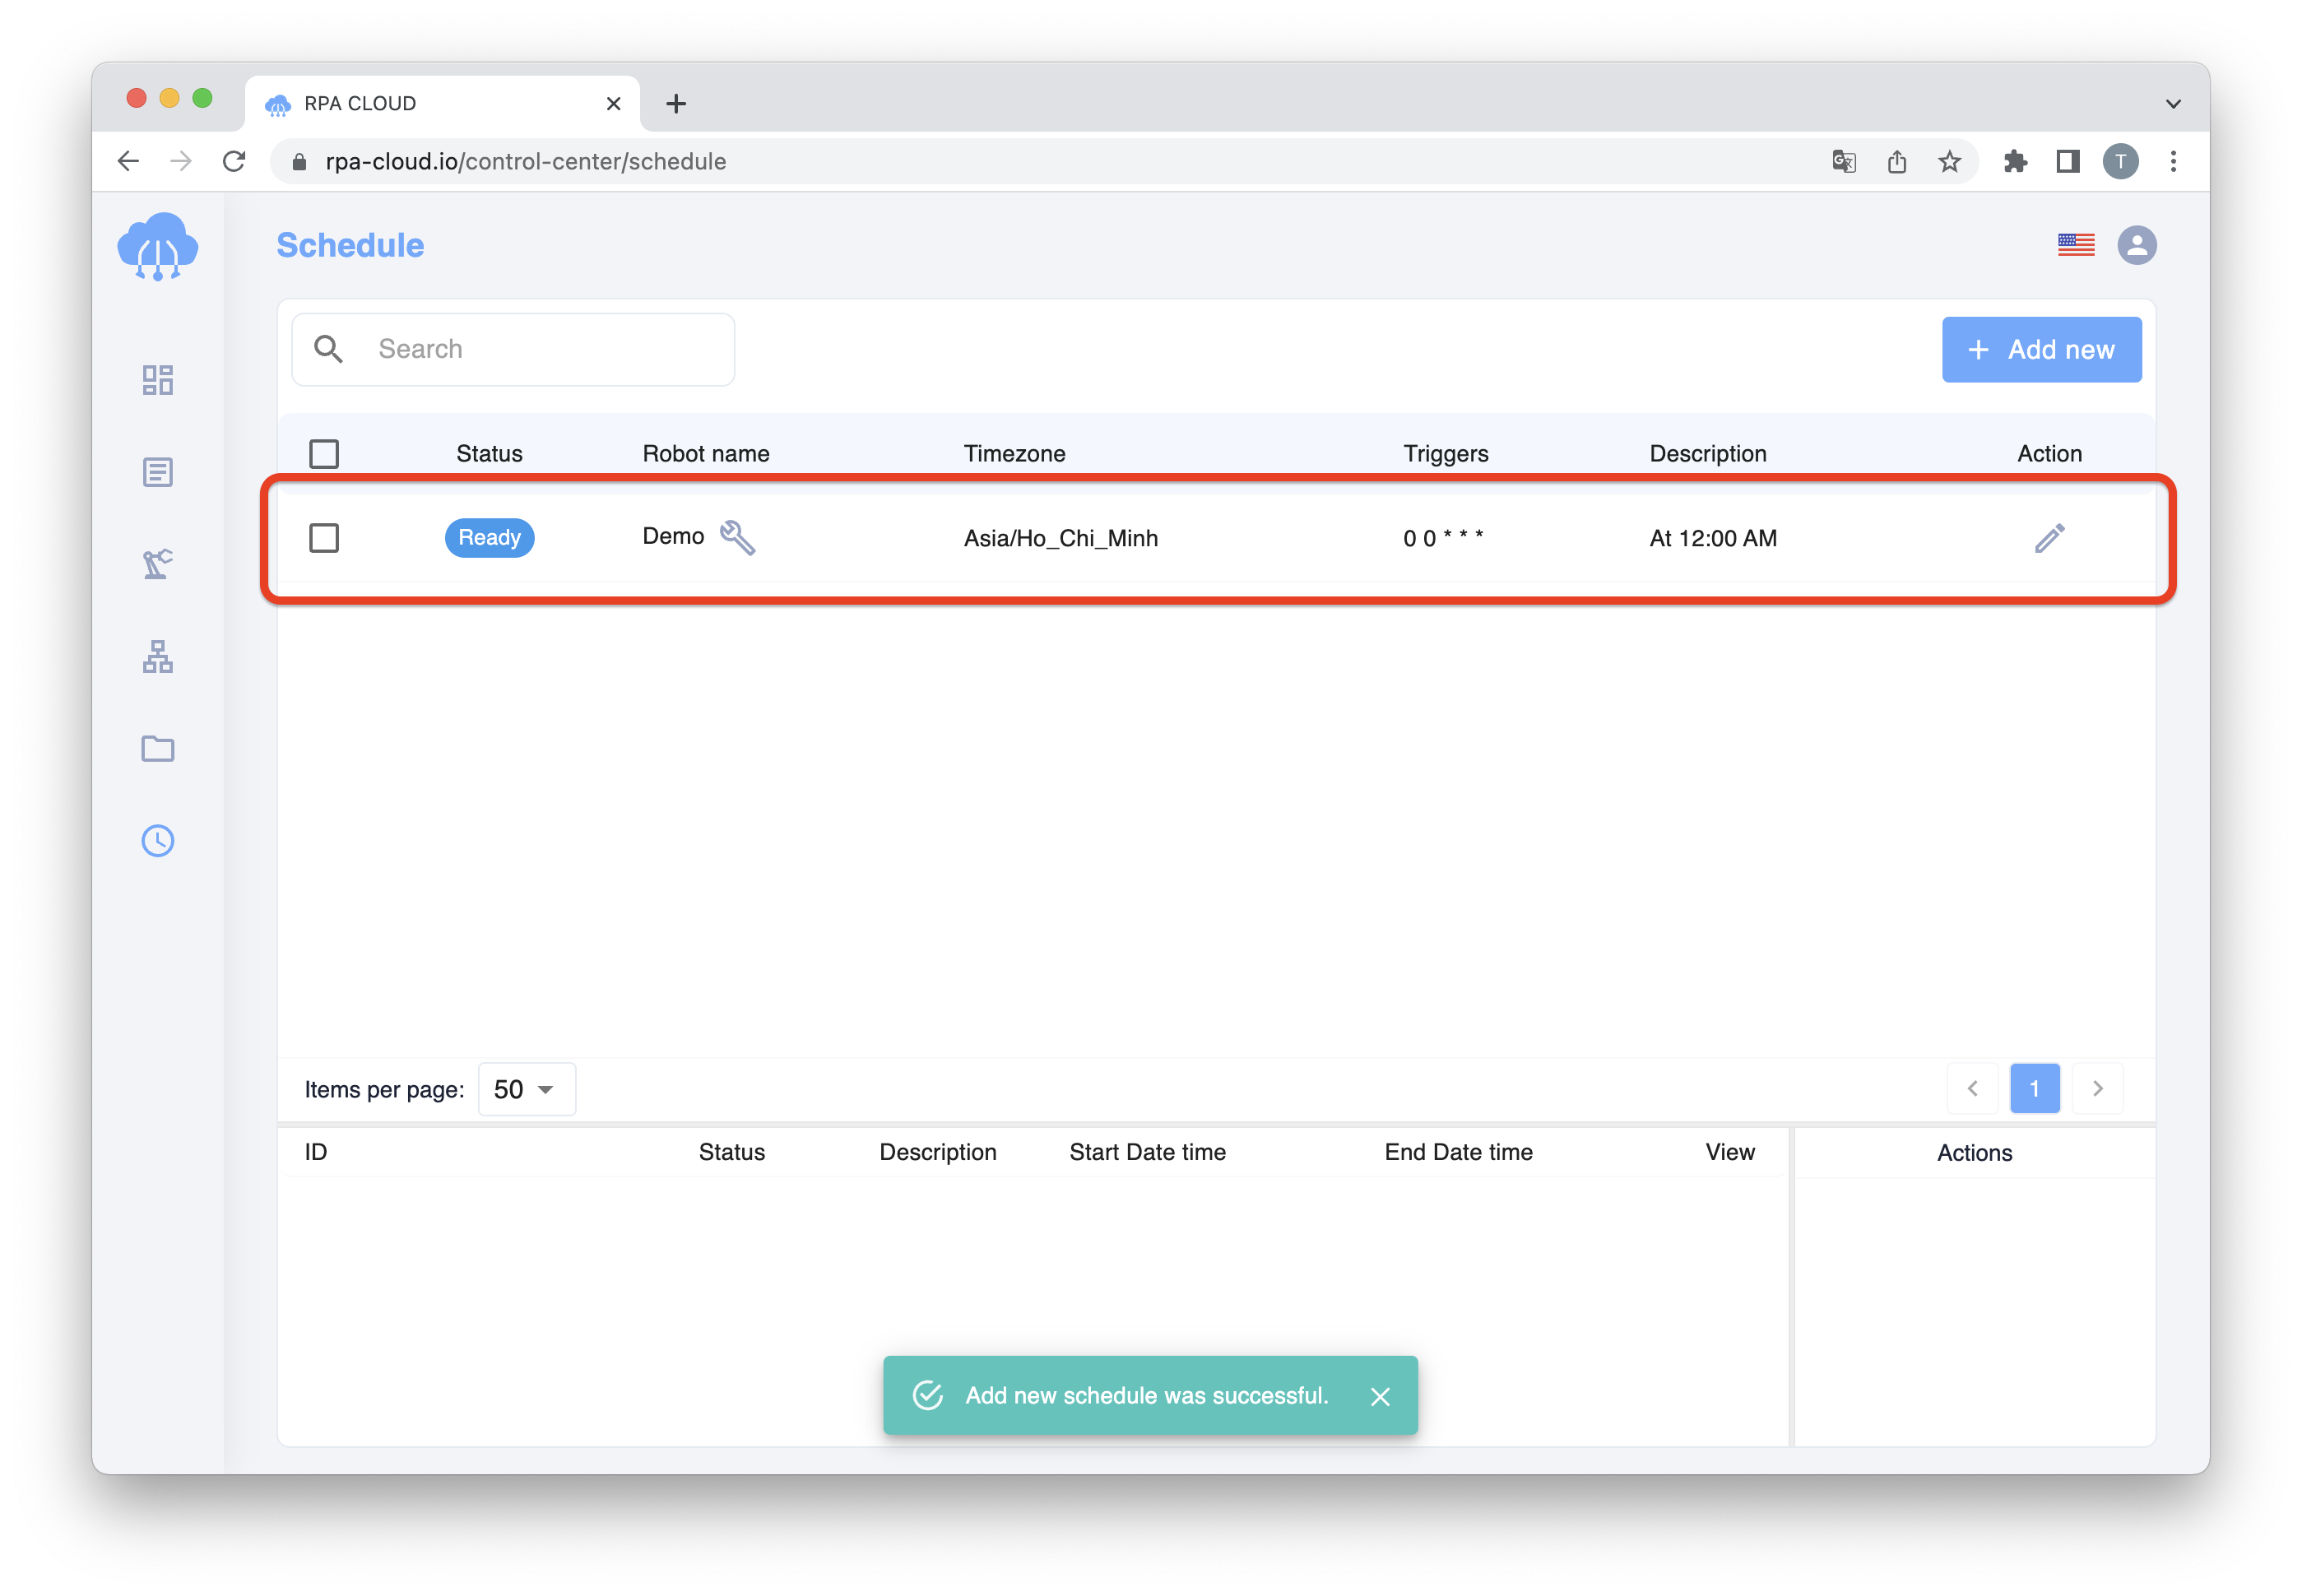
After finishing setting schedule, a record will appear as the picture below, and one schedule for one record only.
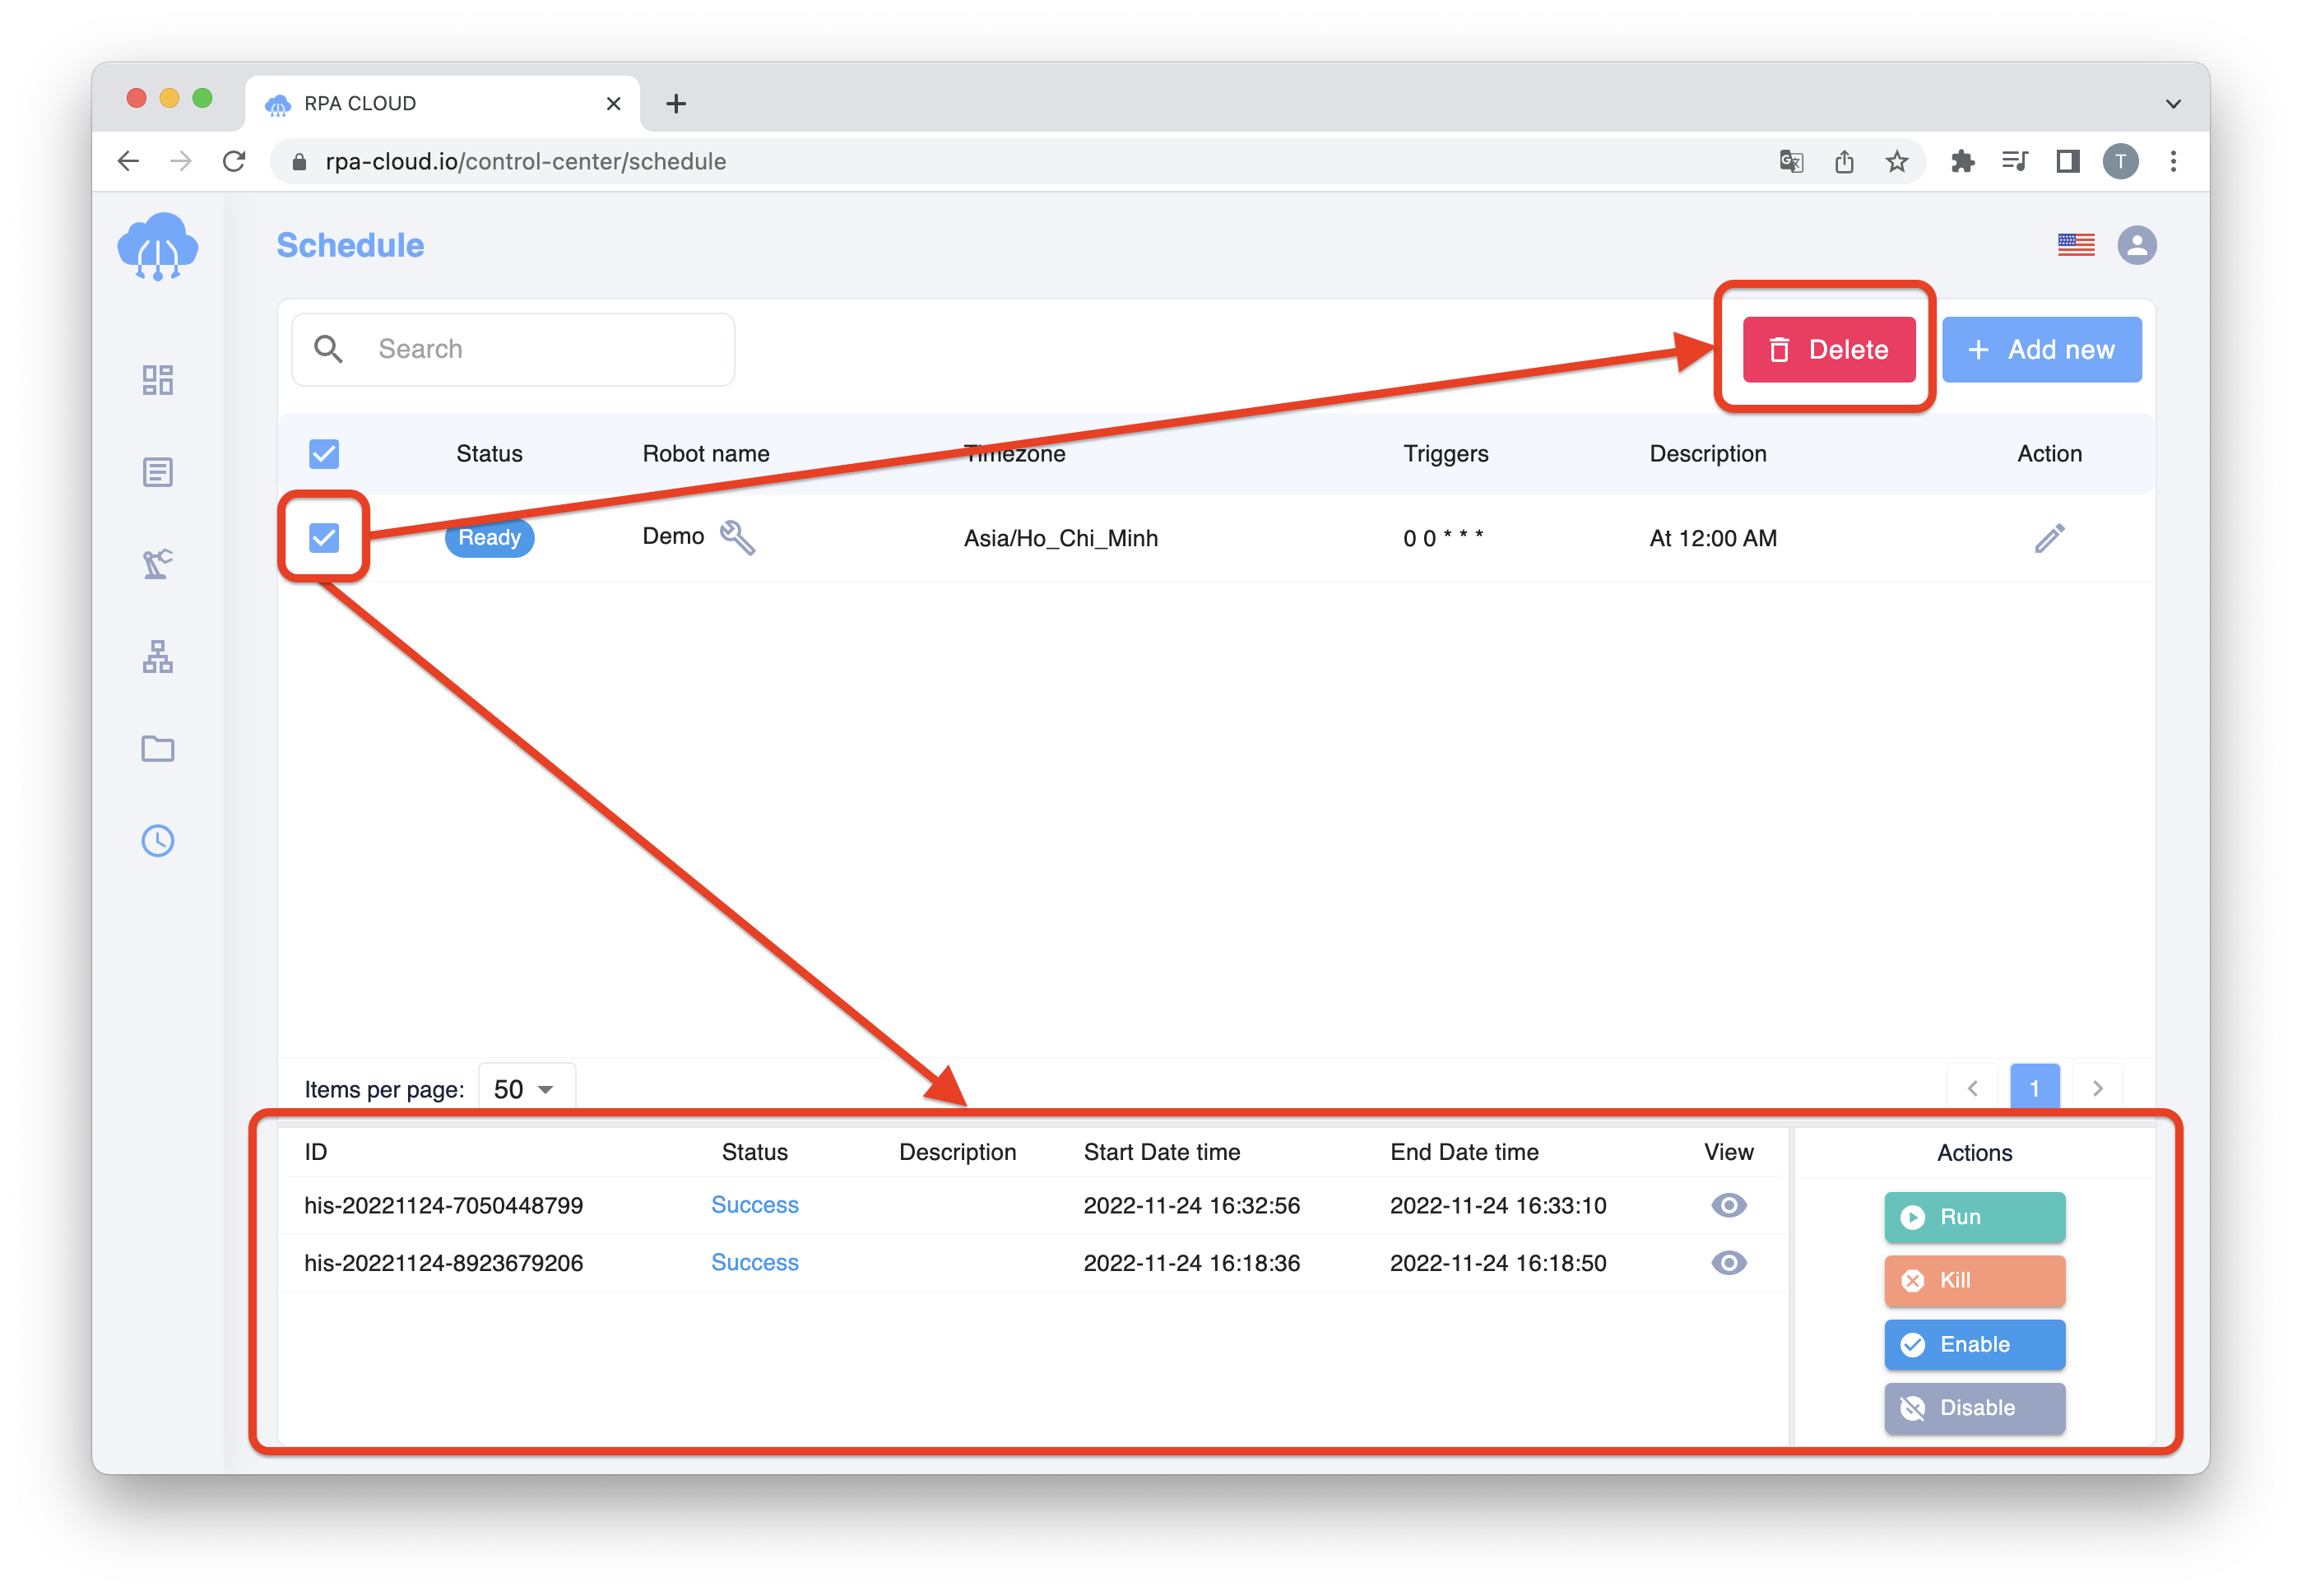
If you want to check or delete the history of a schedule, check the target schedule and select your option.
That’s all steps you need to do when you want to set a schedule for your robot. For any question, please contact us through https://rpa-cloud.io/contact.
Don’t wait another moment to unlock the true potential of RPA CLOUD’s capabilities! Dive into the world of automation with our 25 incredible Chrome functions. Discover more here


