Are you learning about Azure Workflow Automation with Azure Logic Apps?
Completing large amounts of repetitive work each day manually leaves employees tired and exhausted. In this situation, businesses need to find a tool or platform that automates various tasks by connecting them with other services. You need to automate emails and social posts, as well as connect to storage and other services.
Microsoft Azure has brought Logic Apps to help businesses and organizations do this.
In this article, I’ll discuss how to use Azure Logic Apps to automate your work and provide additional important information about Azure Workflow Automation.
What are Azure Logic Apps in Azure Workflow Automation?
Azure Logic Apps is a cloud-based tool that helps you automate tasks and workflows. It lets you create automated processes that connect different services, systems, and apps.
You can easily design these Azure workflow automations using a visual tool and choose from pre-made templates to get started quickly. This makes it simple to integrate and manage your apps, data, services, and systems. It also provides user-friendly tools so you can customize solutions that fit the needs of your business, whether big or small.
With Azure Logic Apps, you can automate many different tasks. You can schedule actions, send emails when something specific happens, process customer orders, move files between servers and cloud storage, and even set up alerts for important events.
Key Features
Below are seven main features of Azure logic apps in Azure workflow automation, including:
- Low-Code/No-Code Development: Logic Apps lets you create complex workflows using simple visual tools and pre-made templates, even if you don’t know how to code.
Ready-to-Use Connections: It comes with built-in connections to Microsoft and other services, making it easy to link with apps like Office 365. - Lots of Actions: Logic Apps can do many things, such as sending emails, updating databases, posting on social media, and more.
- Smooth Workflow: It automatically handles small errors, so you only need to worry about bigger problems that might come up.
- Track Your Progress: You can easily check how your workflows are doing, see their history, and look at logs.
- Safe and Secure: Logic Apps uses Azure Active Directory to keep your information safe. It also follows industry standards.
- Works Well with Other Azure Tools: It connects easily with other Azure services, making it a powerful part of your cloud setup.
Use Cases
Let’s explore typical use cases of Azure Workflow Automation!
Financial Service Firm
A financial services company could use Logic Apps to automatically approve client transactions. It connects with all their systems, like customer relationship management (CRM), accounting, and compliance tools, to make sure each transaction follows the rules.
Healthcare Provider
A healthcare provider could use Azure Logic Apps to make scheduling patient appointments easier. When a patient asks for an appointment, Logic Apps automatically checks if the doctor is available and then adds the appointment to the hospital’s schedule.
Customer Support Center
A customer support center could use Logic Apps to make handling support tickets easier. It automatically sorts tickets into different groups, sends them to the right teams, and brings urgent problems to the attention of the right people quickly.
How to Create Azure Workflow Automation with Azure Logic Apps?
Step 1: Make a new Logic App
1.Go to your Azure portal, where you have an active subscription.
2. Click on “Create a resource” and search for “Logic Apps” in the Marketplace. Click on the Azure Logic App service.
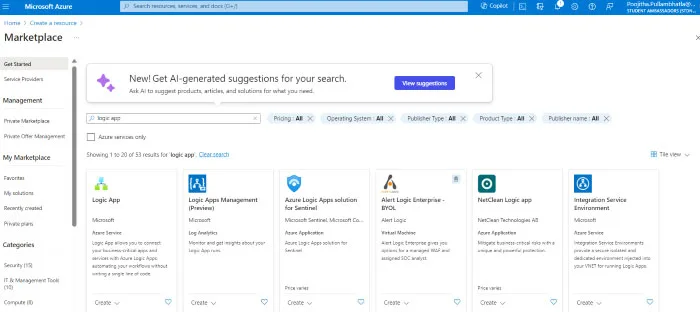
3. Click on “Logic App” and then click “Create.”

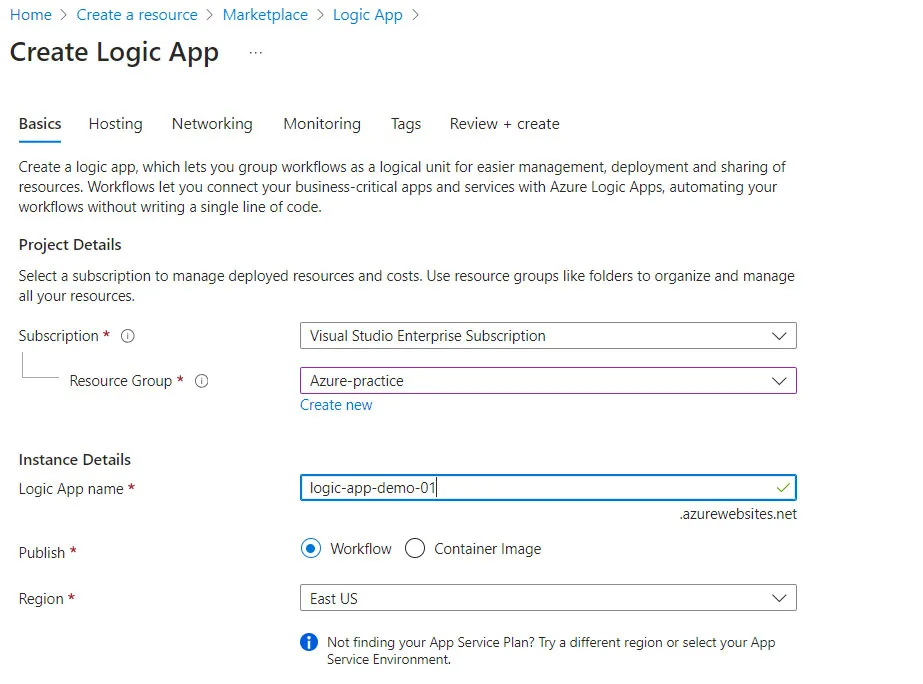
4. Fill out the following details to create the logic app:
- Under “Project Details,” choose your subscription and Resource Group. You can make a new group or use an existing one.
- Under “Instance Details,” give your logic app a name.
- You can leave the rest of the details as they are or change them if you want.
5. Click on “Review + create” and then “Create.”
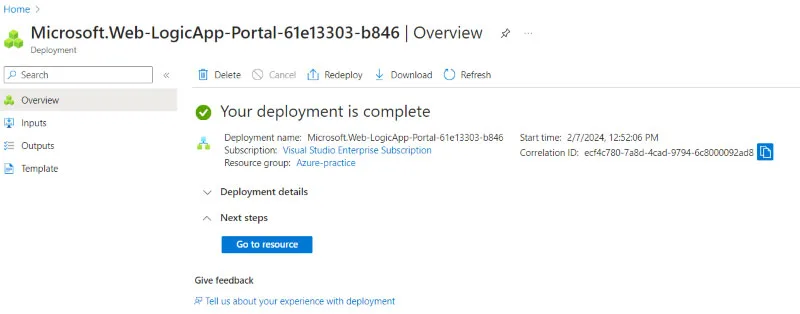
6. Wait a few seconds for the system to get everything ready. Once it’s done, click on “Go to resource” to see your new logic app.
Step 2: Create a Workflow for Your Logic App
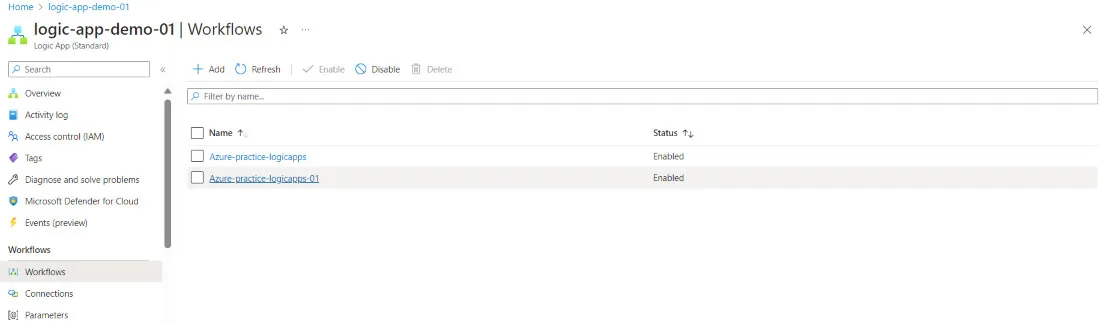
1. Once you’re in your logic app, click on “workflows” on the left side of the screen.
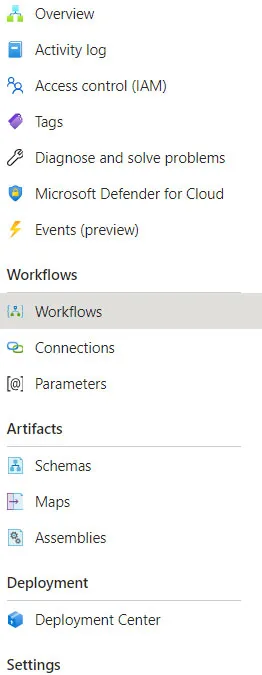
2. Click “+ Add” to make a new workflow.
![]()
![]()
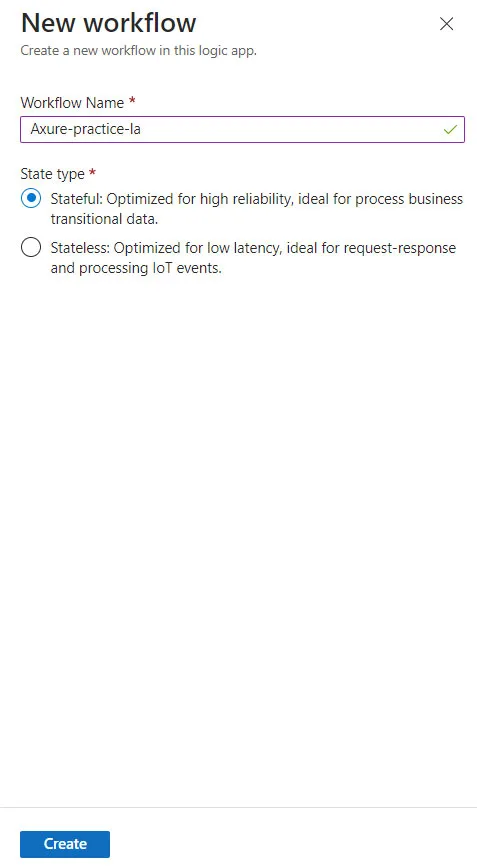
3. Give your workflow a name and choose “Stateful” for better results. Then click “Create”
4. Click on the new workflow you just made.
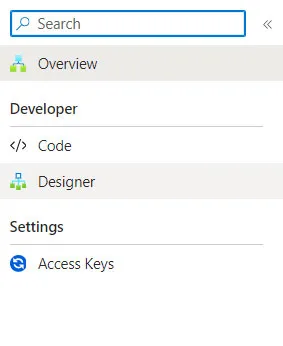
5. Under the “Developer” section, click on “Designer” to start building your workflow.
Step 3: Build Your Workflow
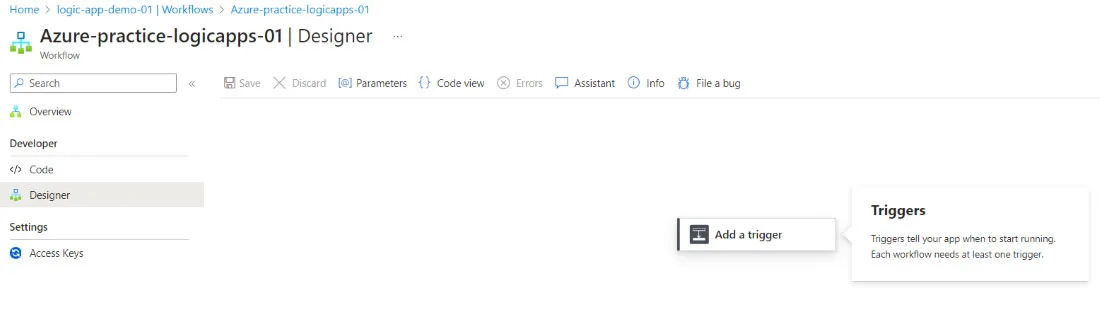
1. In the “Designer,” you’ll see an option to “Add a trigger.” A trigger is the first action your logic app takes.
2. Let’s choose “when a HTTP request is received.” This means our logic app will do something when it gets an HTTP request.
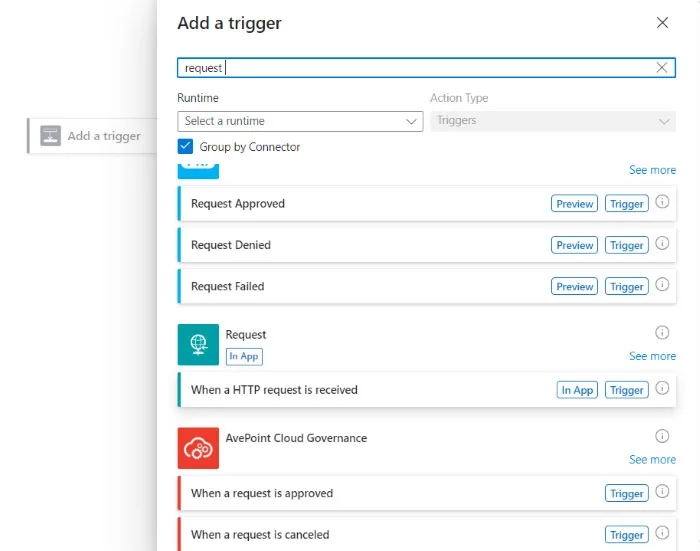
3. Under “Advanced options,” pick “Method” and then choose “GET.” This tells the logic app what type of request to expect.
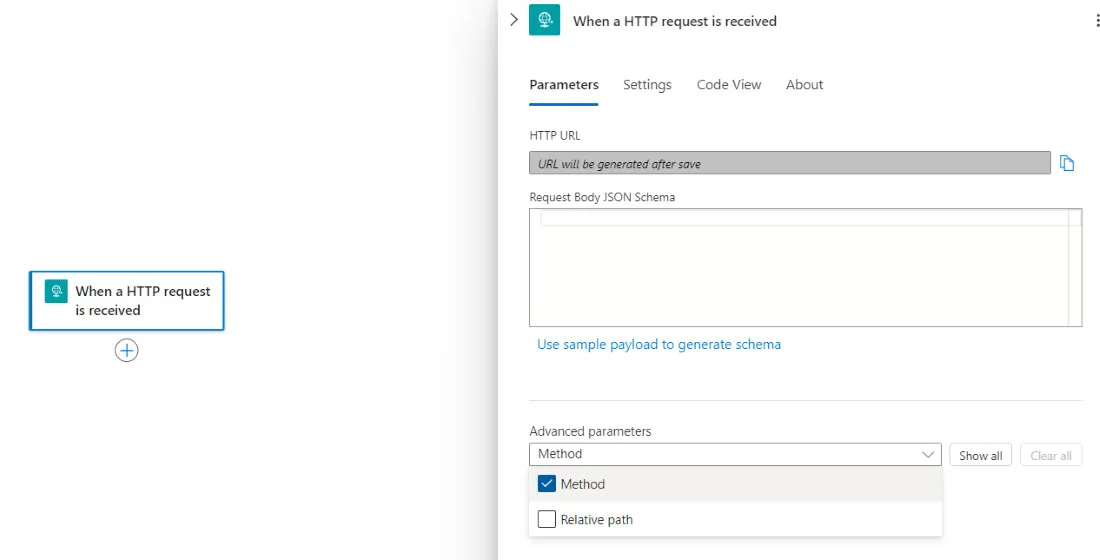
4. Click “Save” to keep your changes.

5. Now, let’s add the next action. Hover over the “+” icon and click “Add an action.”
6. We want the logic app to reply with a message when it gets a “GET” request. Search for “HTTP response” and choose it.
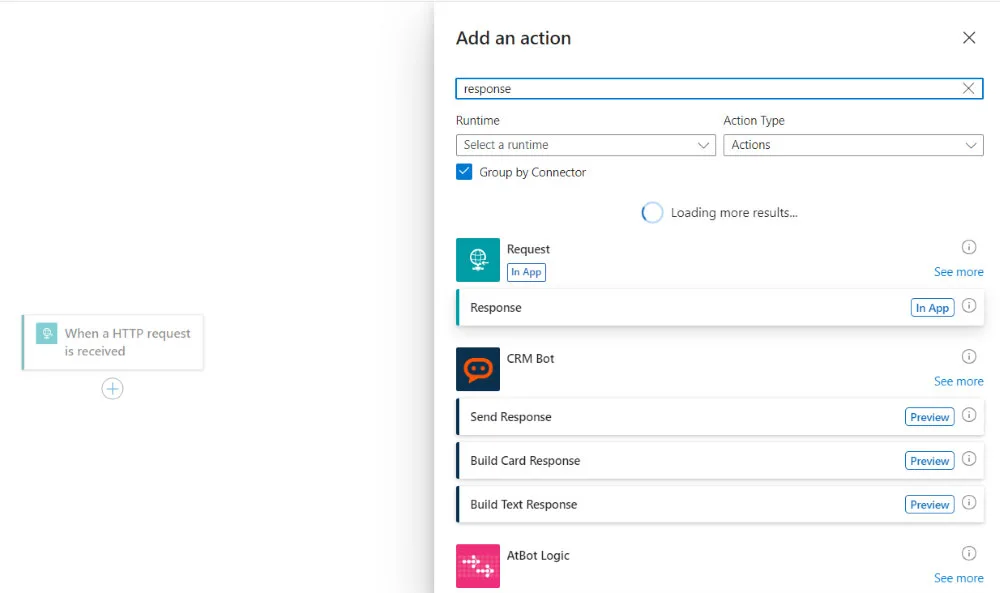
7. For now, let’s just type a simple message in the body and save the changes.
8. Go back to the “Overview” tab and click “Run.”
9. You’ll see a log of what happened.
10. Copy the “workflow URL” from the “Essentials” section.

11. Paste that URL into your web browser to see your automatic response!
Step 4: Use Changing Values in the Workflow URL
1. Go back to your logic app design, and in the trigger section, choose “Relative Path” under “Advanced options.”

2. Type in the name of the value you want to change in the URL. Make sure to use a forward slash “/” and put the name in curly braces “{}”.
3. Save the changes and move to the “HTTP response” step. In the body, click on the little lightning bolt icon to add the changing value.

4. You’ll see a list of options. Find the name you used in the relative path earlier.
5. Click on that name to add it to the body. Save the changes.
6. Go to the “Overview” section on the left and copy the updated workflow URL. Paste it into your browser.
7. Change the part of the URL where you put your name with the information you want.

8. Now you can see the changed response in the browser!
Azure Logic Apps helps you automate repetitive tasks or business processes that involve multiple steps. For example, you can use it to keep data up-to-date, send notifications, manage approvals, transfer files, and more.
Finally, I hope you can get more useful information about Azure Workflow Automation and learn how to create workflow automation with Logic Apps.
Read more: