You need a tireless helper to help you do your repetitive tasks without needing you to remind them every time. Pipedrive workflow automation is one of the good choices you should consider.
Pipedrive does the boring, repetitive tasks for you, like sending emails, reminding people to follow up, scheduling calls, and so on. You can set up automated tasks so the software will automatically Dynamically do what you want when a new lead comes in or a milestone in your sales process is reached.
To give you a better look at this software, I’ll show you how to set up and use Pipedrive’s workflow automation feature quickly and effectively.
How to Automate Tasks with Pipedrive?
Let’s learn the basics of building automated tasks in Pipedrive workflow automation. It works like a simple recipe with two parts:
- Trigger: This is the “if” part of the recipe. It tells Pipedrive when to start the task. For example, the trigger could be “if a new deal is created.”
- Action: This is the “then” part of the recipe. It tells Pipedrive what to do after the trigger happens. For instance, the action could be “then send an email to the contact.”
So, you set up a rule that says “if a new deal is created, then send an email to the contact’s email address.” Pipedrive will automatically send that email whenever someone creates a new deal!
How to Create Pipedrive Workflow Automation?
In Pipedrive workflow automation, you can set up automatic tasks to save you time. This is called workflow automation.
First, find the three dots at the bottom left of the home screen and click on “Workflow Automation.” There are pre-made options you can change to fit your needs, or you can create your own.

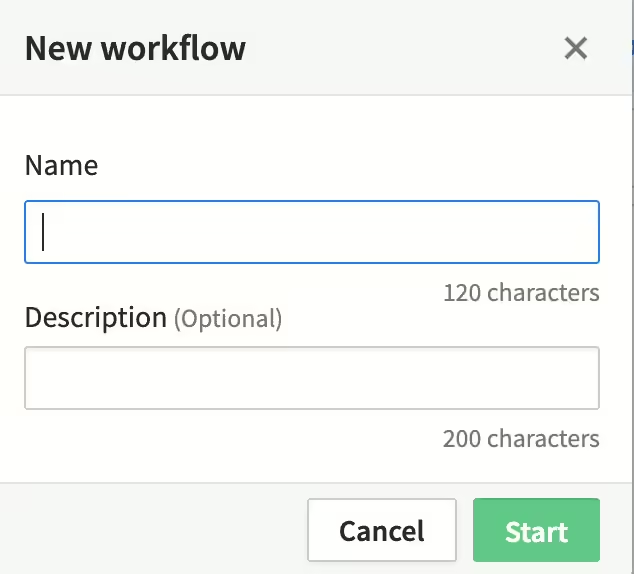
To create your own workflow, click “Add custom workflow” and give it a name. Then, click “Start” to begin setting it up.
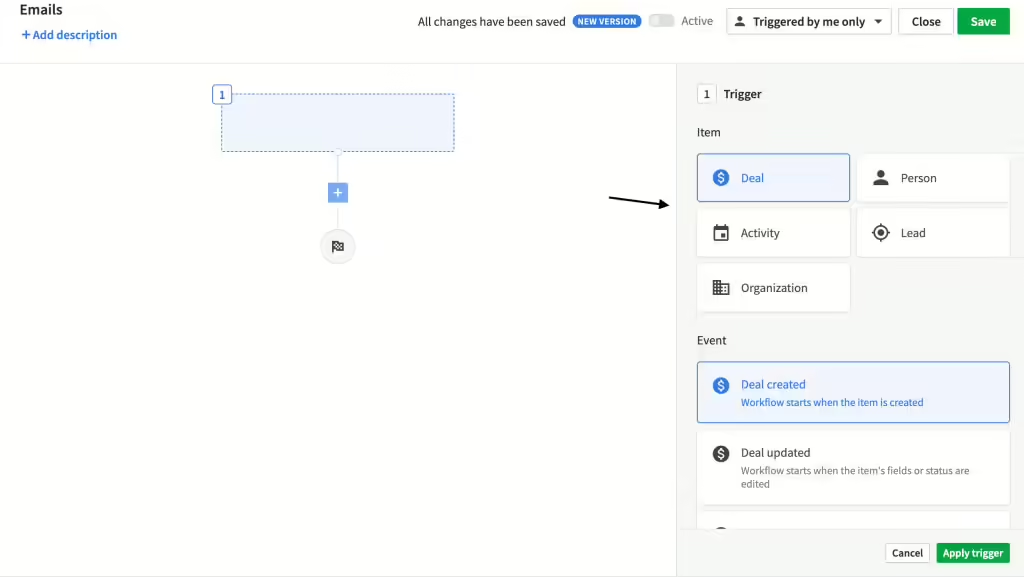
Next, click “Add Trigger” to choose what will start the automation. You can pick things like a new deal being created, a person being updated, or an activity being deleted. Once you’ve chosen something, click “Apply trigger.”
You can also add conditions to your workflow. A condition is like a rule, such as only triggering the automation if the deal is for a specific company. Click “Apply conditions” once you’ve set them up.
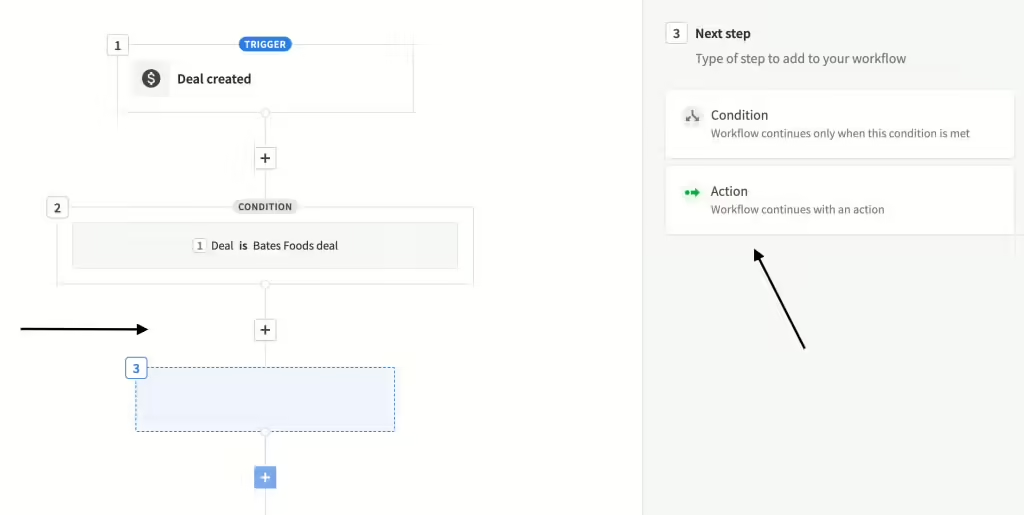
Finally, click the “+” button to set up what the automation will do, called an action. You can choose things like creating a new lead, sending an email, or adding a task. Click “Save” to finish creating your workflow.
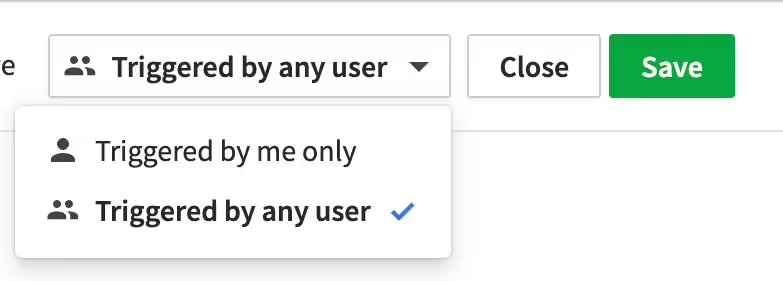
You can allow other people to start the workflow by choosing “Triggered by any user” at the top right.
Main Examples of Pipedrive Workflow Automation
You can set up little helpers in Pipedrive workflow automation to do boring tasks for you, like filing or sending reminders. Let’s explore some ideas for workflows and how to build them yourself with me!
Exchanging Emails
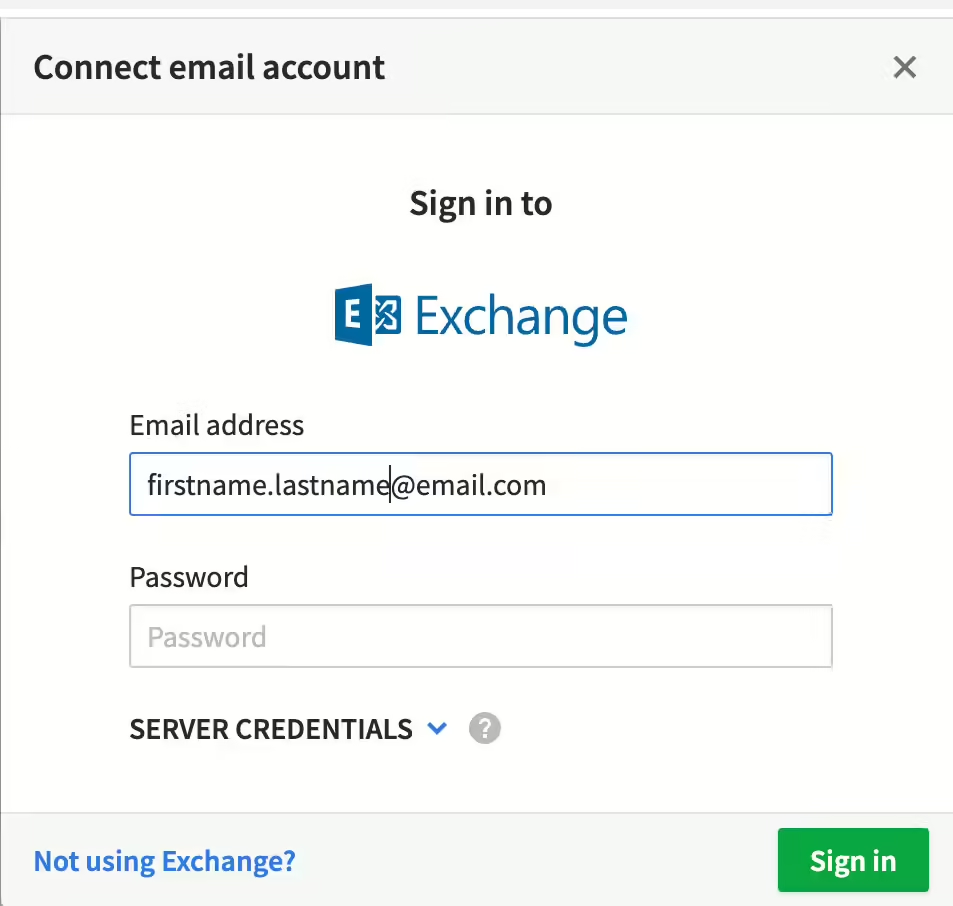
In Pipedrive workflow automation, you can easily connect your work email to the system. This is called Email Sync and it lets you manage your emails directly through Pipedrive. It works with all email providers, but here’s how to set it up for Microsoft Exchange.
First, go to the Mail section and click “Connect your email” and then, you add your work email address and password. Once Pipedrive has access and you give it permission, your email will be synced.
We can use pre-made templates to save time. If you haven’t connected your email yet, Pipedrive will prompt you to do so right away. If you choose a template, you’ll need to set up triggers and actions for your workflow.
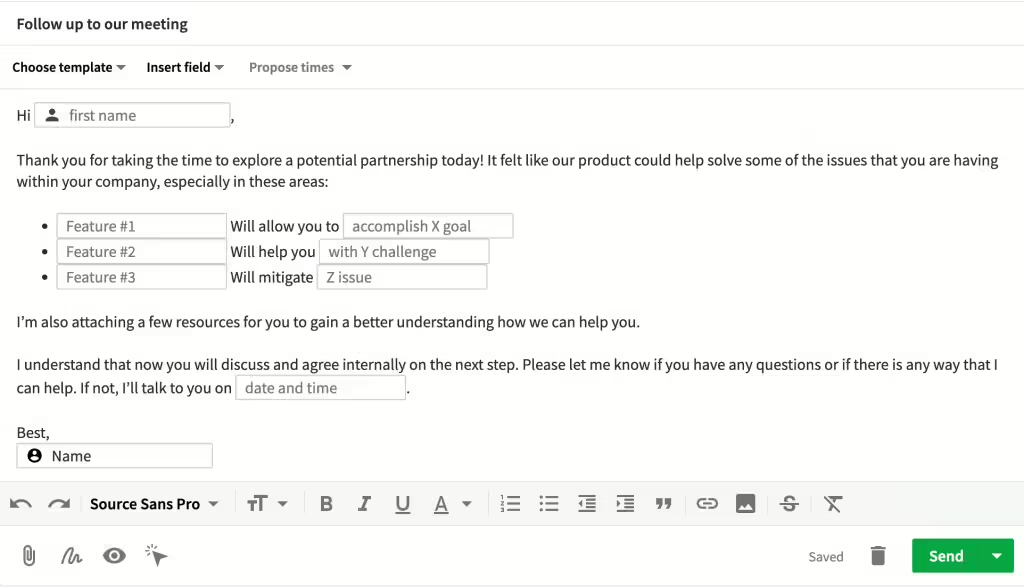
You need to create an email template first. You can find this option in the Mail section on the left sidebar. Click the green button to compose a new email and choose a template that suits your needs.
For this example, let’s use a “Follow Up” template. You can even edit the contents of the email template here.
Going back to the workflow, the trigger is set to “Customer,” so the workflow will start whenever someone with the “Customer” label is added.
For the email settings, you’ll need to choose who will receive the email, which template to use, and other options. Here, we’ve set it up to send an “Intro” email to any new person with the “Customer” label.
The final step is to click “Save” to finish setting up your workflow.
Sending Emails
Let’s set up another workflow to send emails automatically. This time, we’ll send an email whenever a deal reaches a specific stage in your sales pipeline. There’s a pre-made template we can use to save time.
Just like before, a window will pop up to configure the trigger (what starts the automation) and the event (what happens). In this example, the trigger will be when a deal moves to the “Qualified” stage in your pipeline. This means the workflow will send a follow-up email once a potential customer becomes qualified.
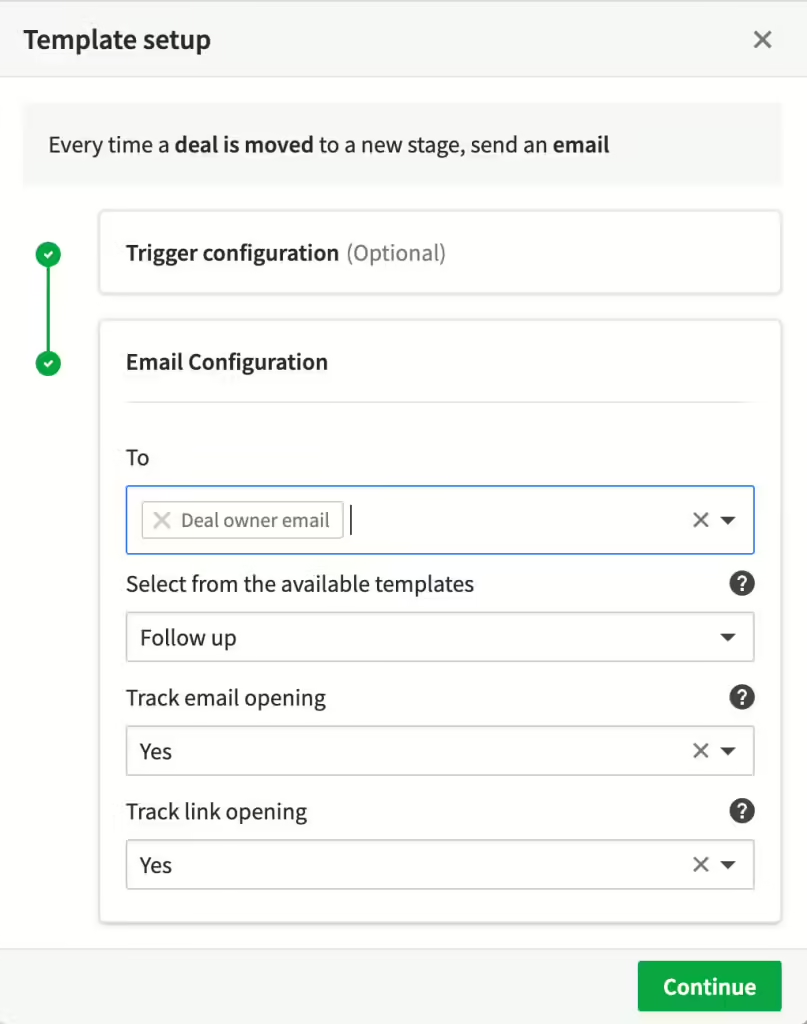
You can also track how people interact with your emails by checking the boxes for “Track email opening” and “Track link opening” This will tell you if people are reading your emails and clicking on any links you include.
Finally, give your workflow a name, choose who can start it manually if you want, and click “Save” to finish setting it up. You can create more workflows like this to send different emails based on where deals are in your pipeline.
Automating Follow-ups
Sometimes you need to nudge potential customers (leads) with follow-up emails to keep the sales conversation going. Pipedrive workflow automation can be a big help here!
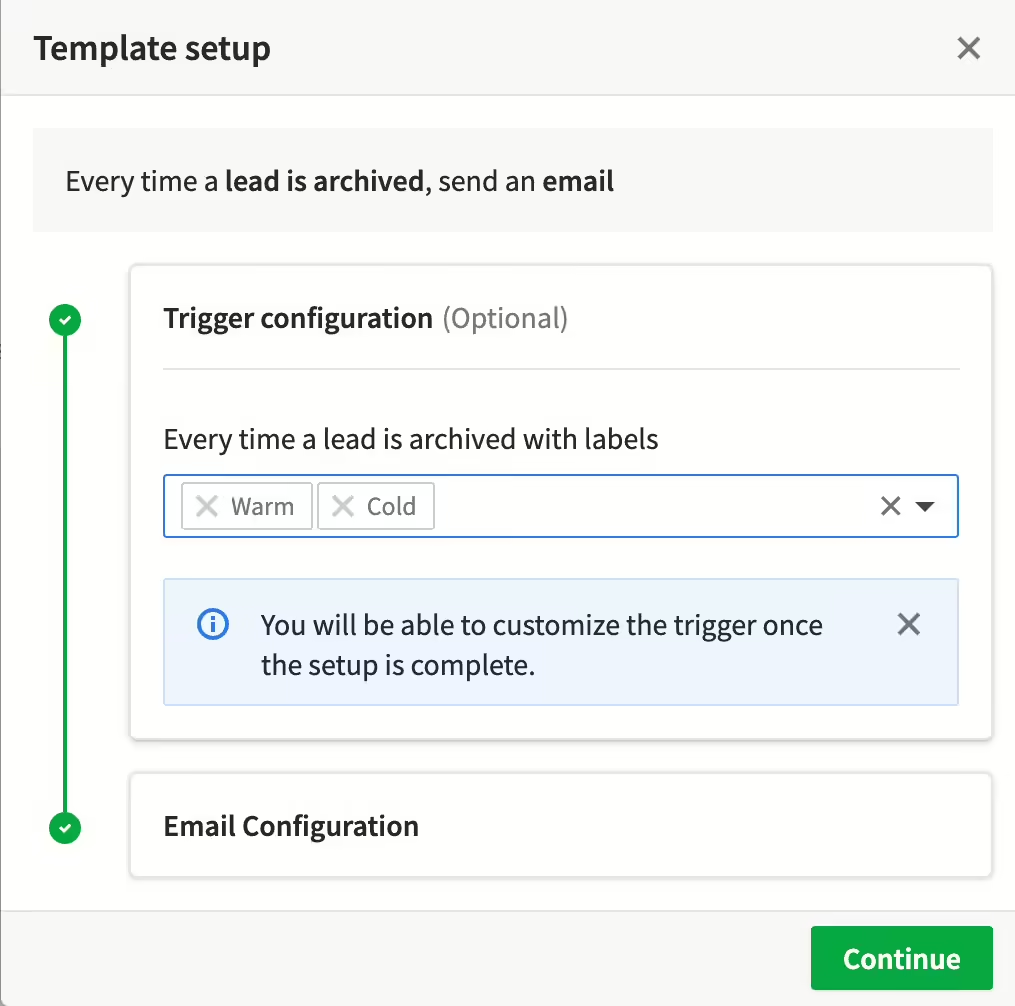
Let’s create a workflow that automatically sends follow-up emails to leads who haven’t been contacted for a while (archived leads). There’s a pre-made template to make things easier.
Choose the follow-up email template and set it up. We’ll set the trigger to send emails to leads marked as “Warm” or “Cold.” This means the workflow will target leads who haven’t shown much interest yet.
There’s no email template for this workflow, so you’ll need to write the email content directly in the body section. To see if people are opening your emails, be sure to check “Yes” for “Track email opening.”
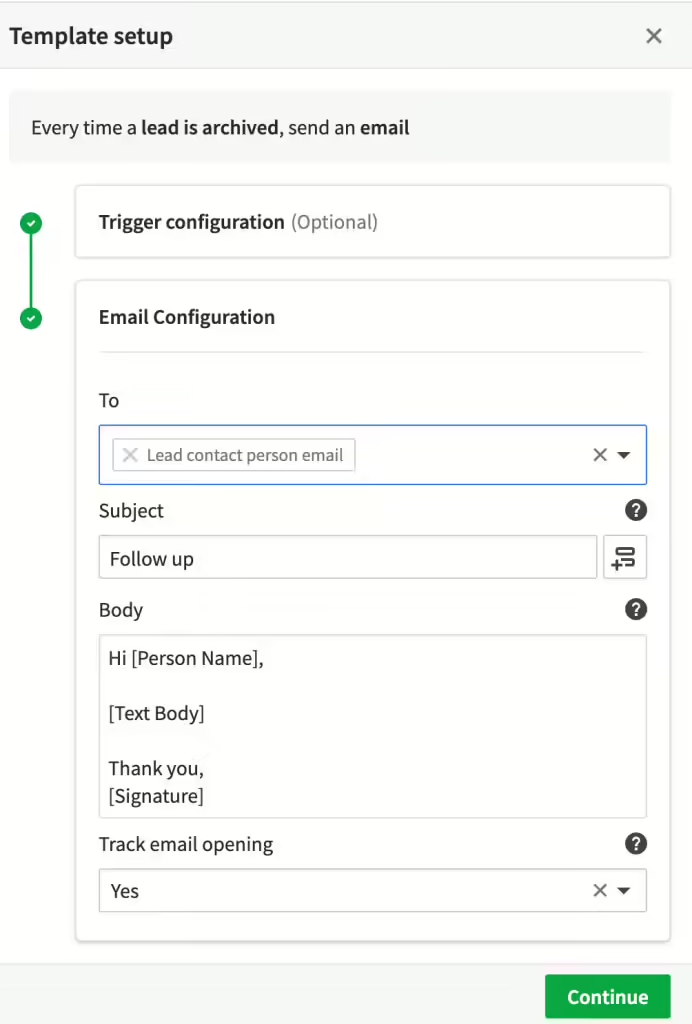
Once you’re happy with everything, click “Continue” to finish setting up the workflow. Then, choose who can start the workflow manually (if you want) and give it a name.
Text Messaging
Text messages are a great way to reach out to people. A popular service for this is Twilio. With Twilio, you can send messages to single people or groups from your Pipedrive contact list. Here’s how to set it up:
- Find Twilio in the Pipedrive workflow automation marketplace and click “Install Now.” Give Twilio permission to access your Pipedrive data.
- You’ll be asked to create an account with a service called Ulgebra. You can use your email for this.
- Next, you’ll need to enter two codes from your Twilio account. Click “Get here” to find these codes and then click “Authorize Now.”
- To send a message, you also need to add a phone number. Click “Add Number” to set up.
- Next, you should create a text message template that you can reuse.
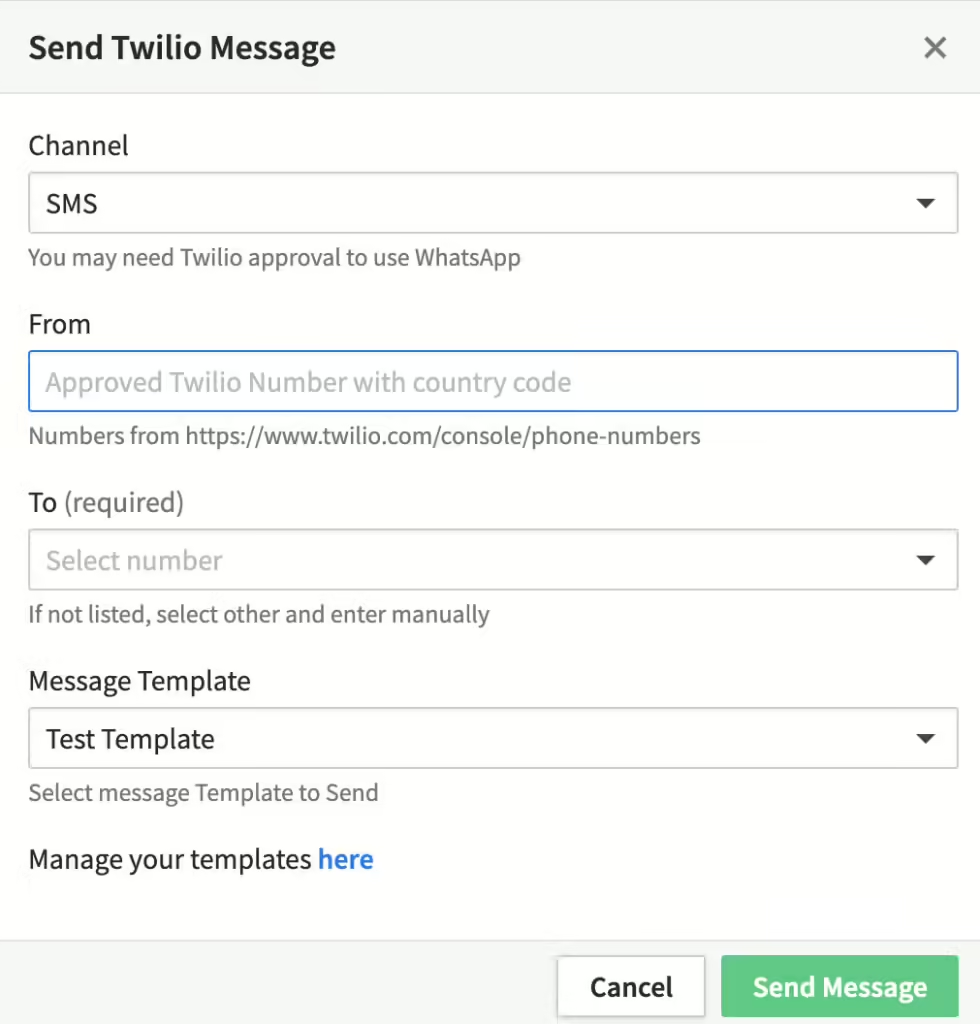
- Then you find the recipient in your Pipedrive contact list and click the three dots in the top left corner. Select “Send Twilio message.”
- A window appears, you can write a message or choose a template. You choose the phone number to send and click “Send message”.
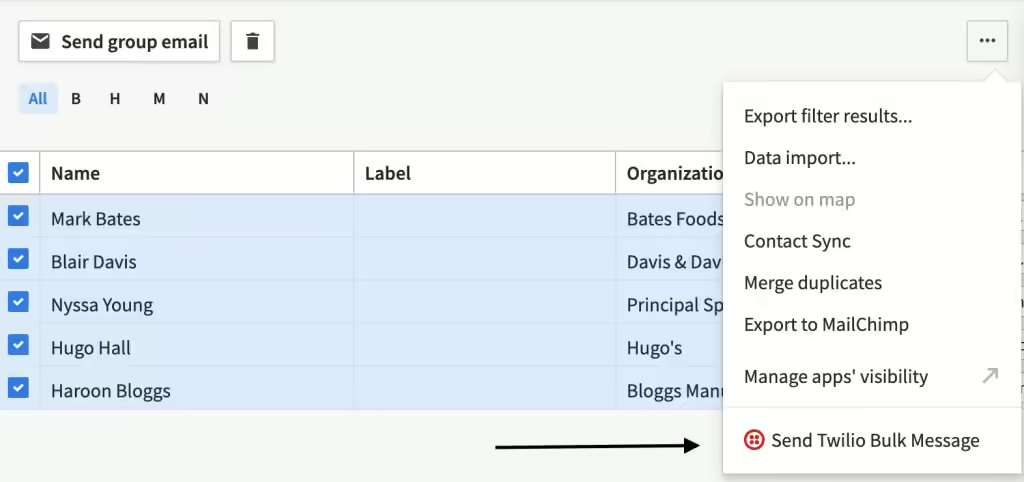
Sending messages to a group of contacts is similar. In your contact list, select the contacts you want to message and click the three dots. Choose “Send Twilio Bulk Message” and then fill out the details like you did for a single message. Click “Send Message” to send the group text.
Importing Data
You can move your information between Pipedrive workflow automation and other places like spreadsheets (Excel, Google Sheets) or databases (BigQuery). This way, you can keep your data up-to-date in different tools.
Here’s the easy way to do it:
- Connect Pipedrive to a service called Coupler.io. Think of Coupler.io as a bridge between Pipedrive and other tools.
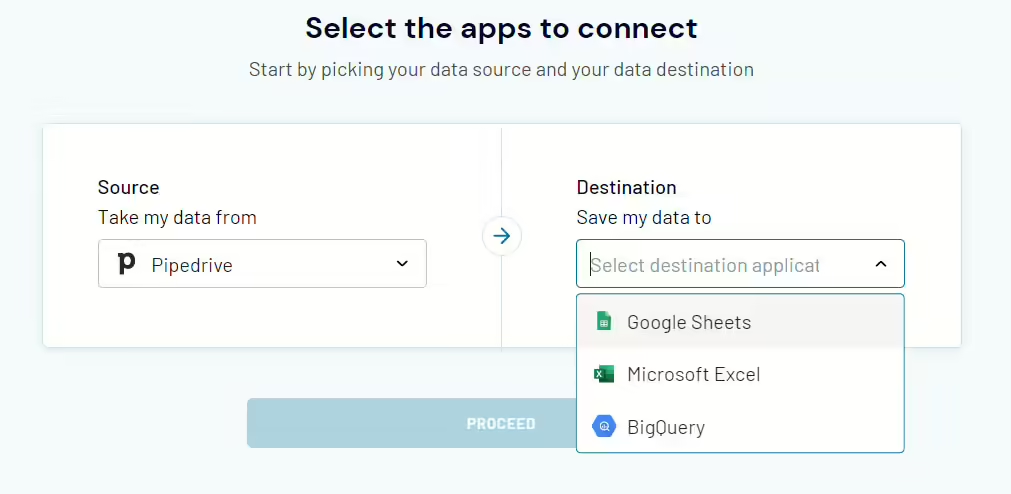
- Once connected, you can choose to automatically send your Pipedrive data (deals, leads, activities, etc.) to Google Sheets, Excel, or BigQuery.
- You can set a schedule for these automatic updates, like every hour or every 15 minutes. This is helpful if you use spreadsheets or databases for reports or tracking your progress. For example, imagine you have a dashboard in Excel that shows your sales data. By connecting Pipedrive workflow automation to Excel with Coupler.io, your dashboard will always show the latest information.
Read more: